Controlling IOT Devices with the Pow!r Mount Plus app
Click below for tutorials to get you started with Wink on the Powr Mount app.
![]() Controlling IOT Devices with Pow!r Plus.pdf
Controlling IOT Devices with Pow!r Plus.pdf
![]() Controlling IOT Devices with Pow!r Plus.pptx
Controlling IOT Devices with Pow!r Plus.pptx
Refer to Wink Support for troubleshooting on the website or within the Wink app.
Create Wink account in Wink app.
Set up Wink hub.
Add a device: lightbulb.
Add a device: switch.
Add a device: lock.
Access the device through the Power Mount app.
Add a device to a Targets page.
Combine 2+ actions in one button.


Set up Wink hub
The Wink support website has excellent instructions for setting up the hub.
Here is the setup guide included with the product.
Here is the Wink Hub 2 support site.
Add a device: lightbulb
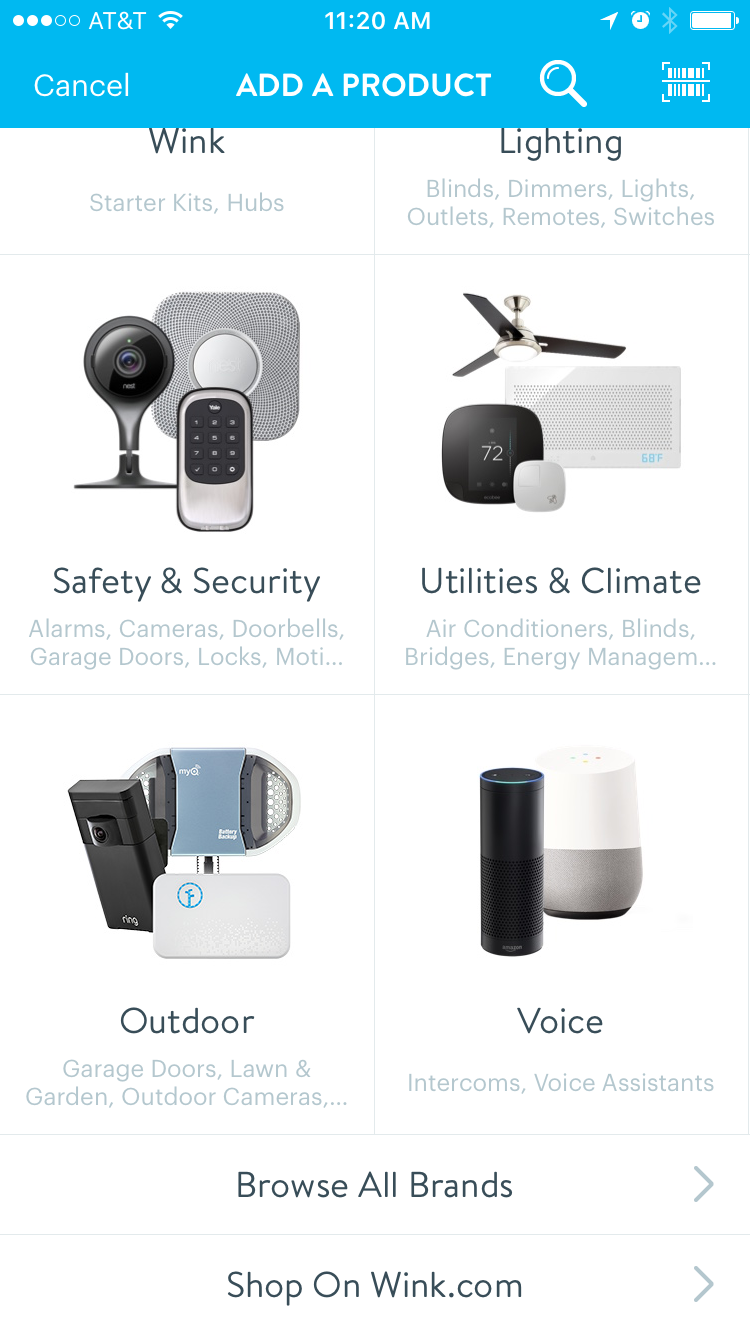
Add a product

In the Wink app Products menu select Add a Product.
Select Lighting
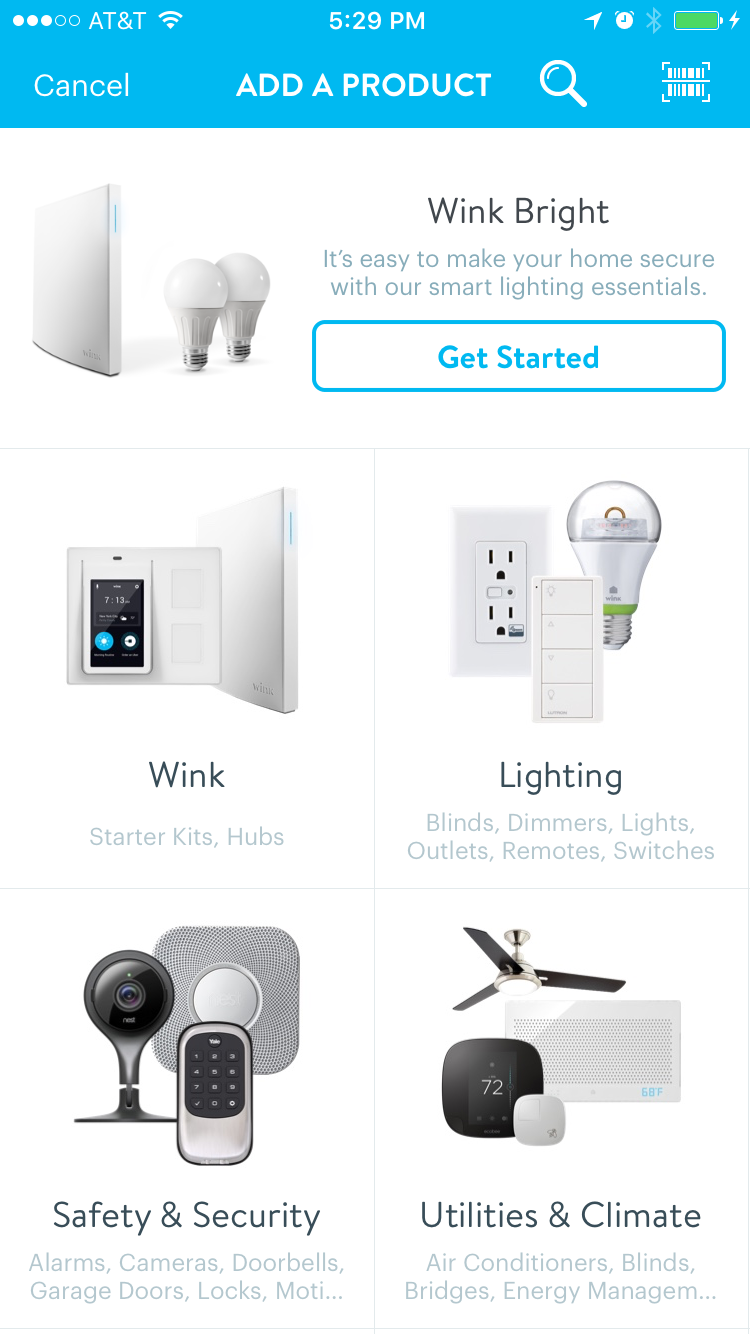
Select the Lighting group
Select Lights
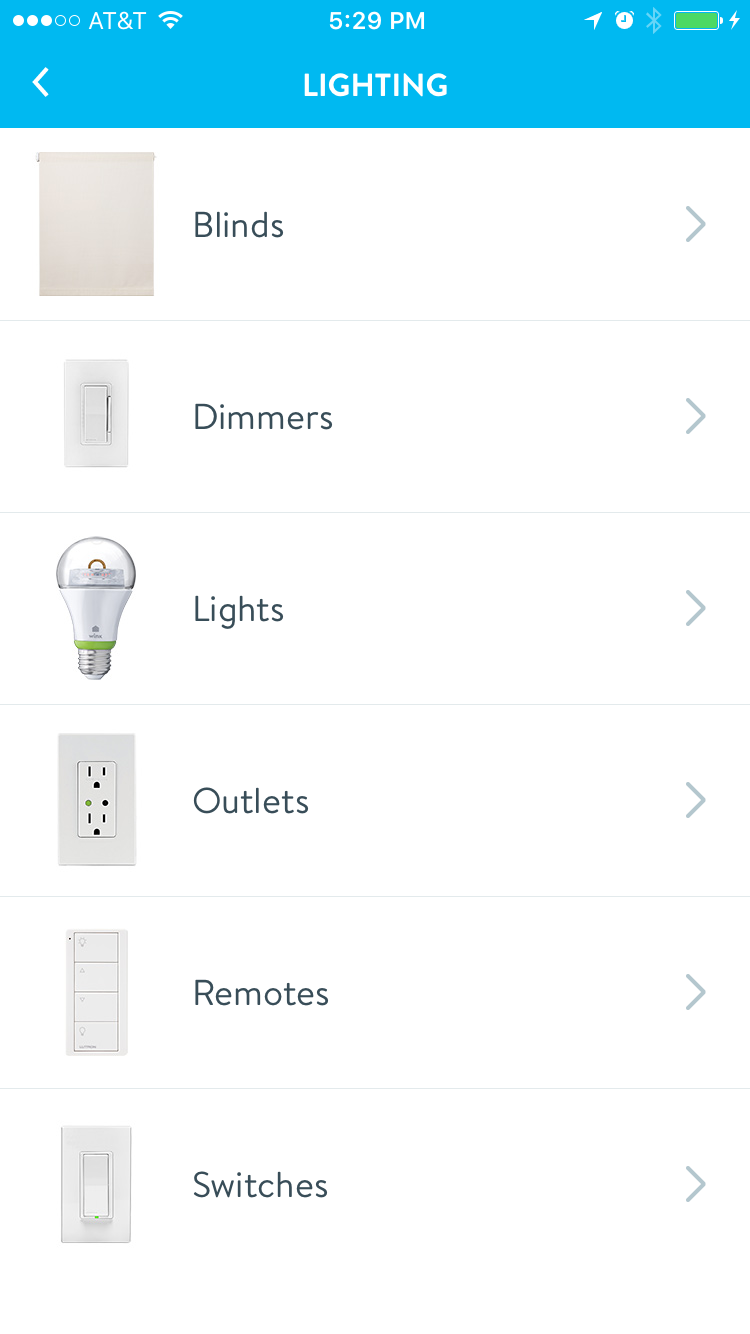
Select the Lights group
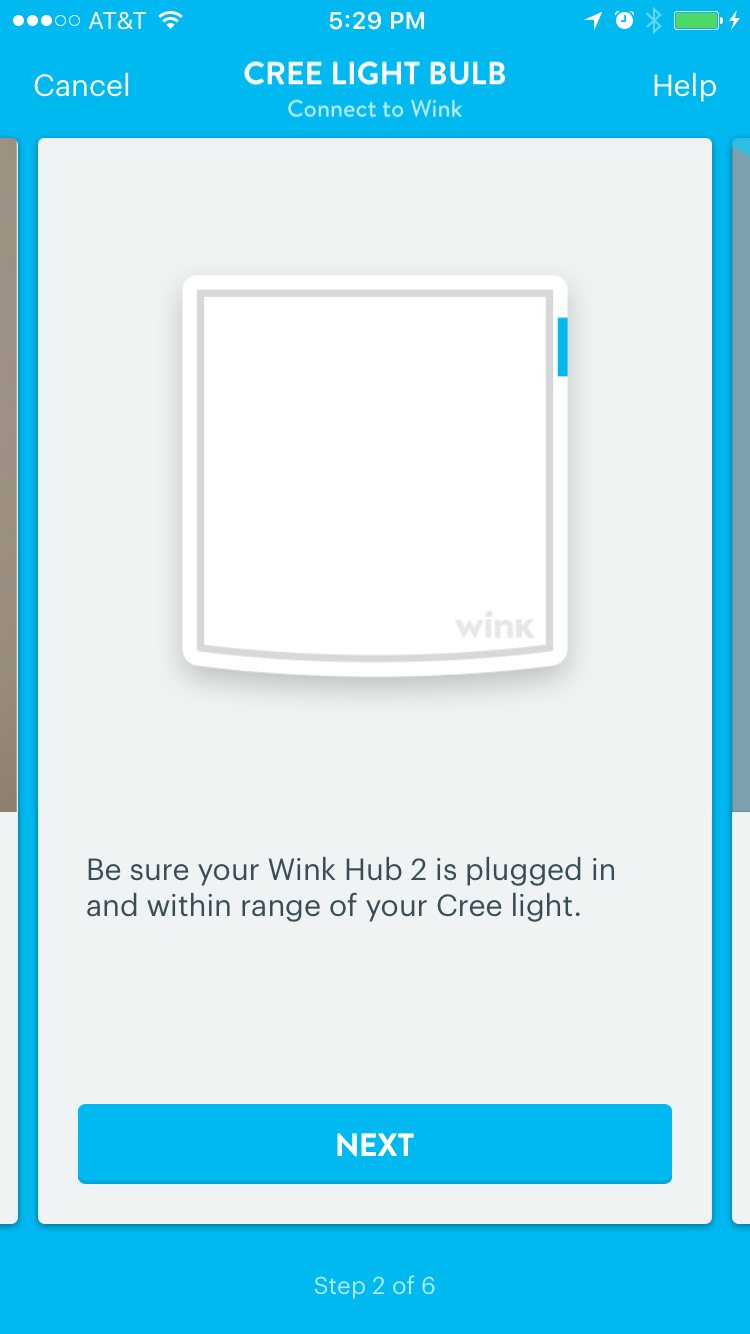
Choose your product

This example uses a Cree light bulb. Select your light.
Wink Walkthrough, Step 1 - Intro

The walkthrough takes you through the steps to connect your light. Select next.
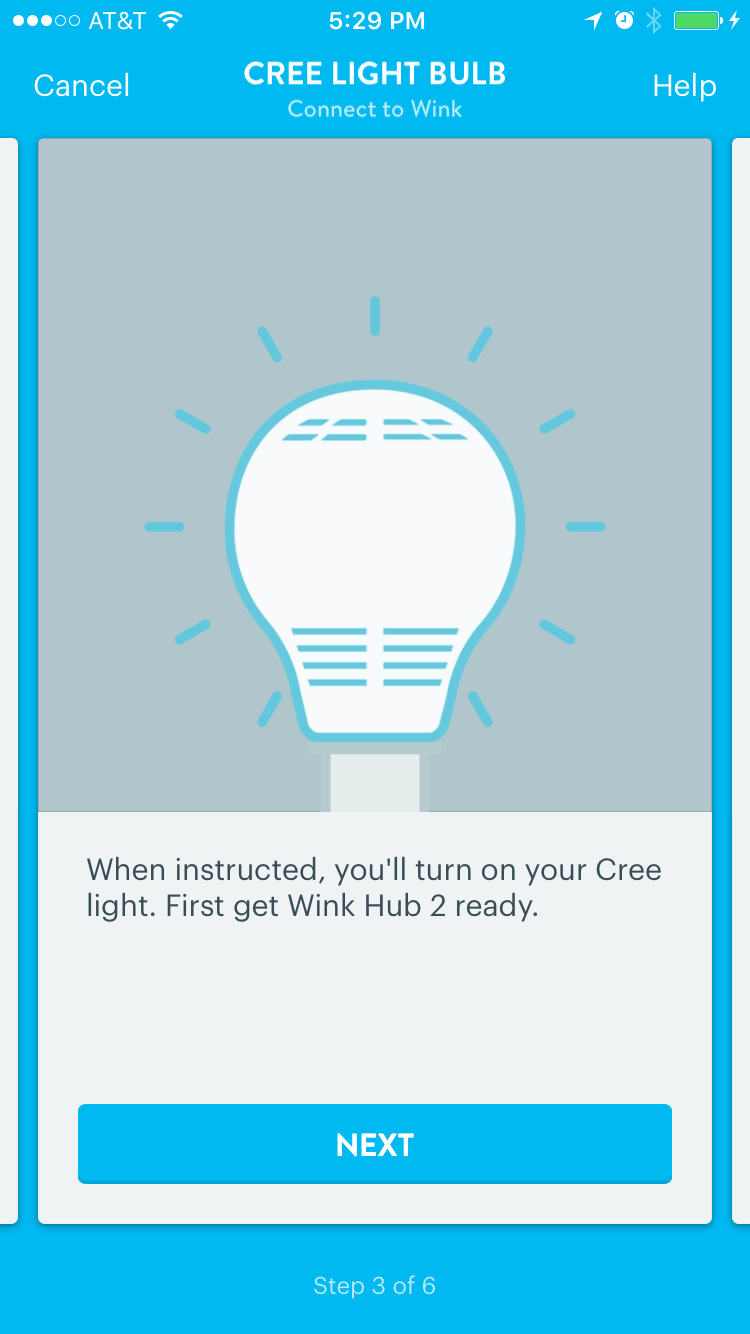
Wink Walkthrough, Step Two - Check hub
Make sure your hub is plugged in and nearby. Select next.
Wink Walkthrough, Step Three - Prepare to connect light
Select next.
Wink Walkthrough, Step Four - Put hub in pairing mode
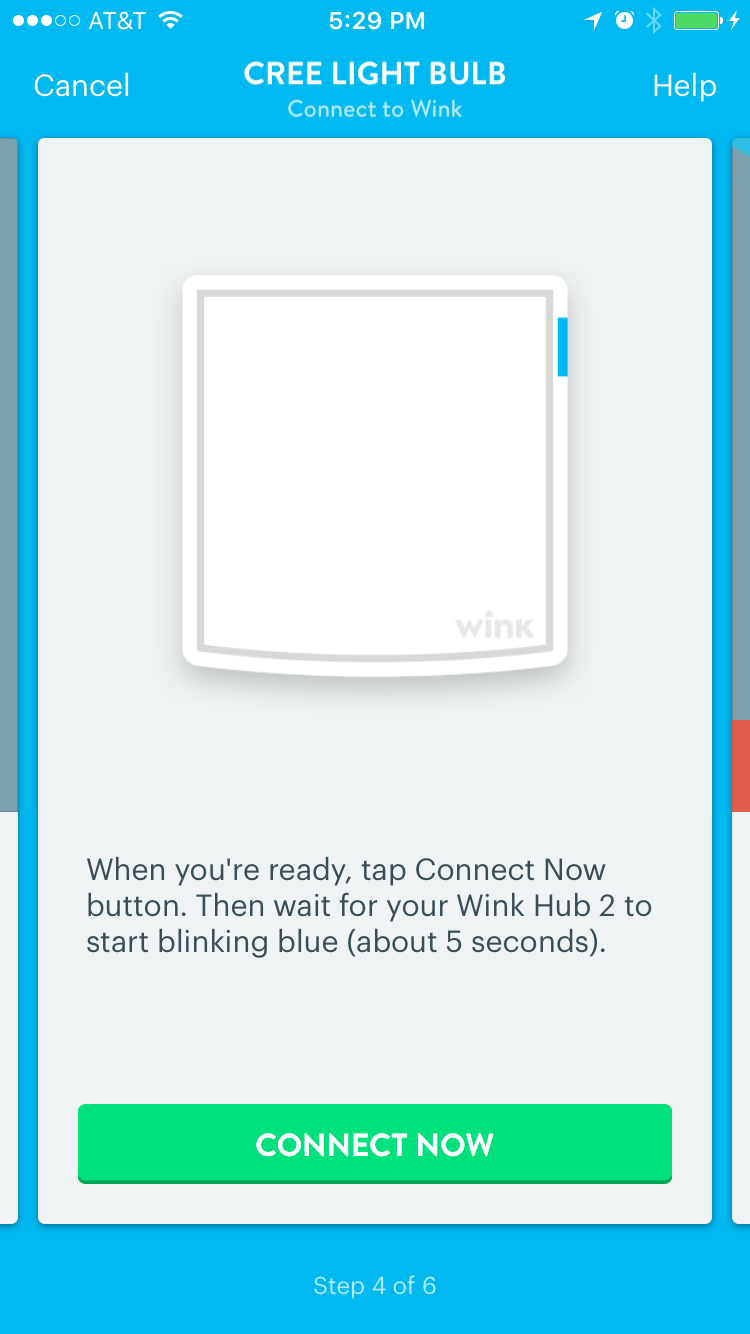
Select connect now to put the hub in pairing mode.
Wink Walkthrough, Step Five - Turn on the light

Turn on your light. The app will move forward after a few moments when it detects the light.
Wink Walkthrough, Step Six - Success
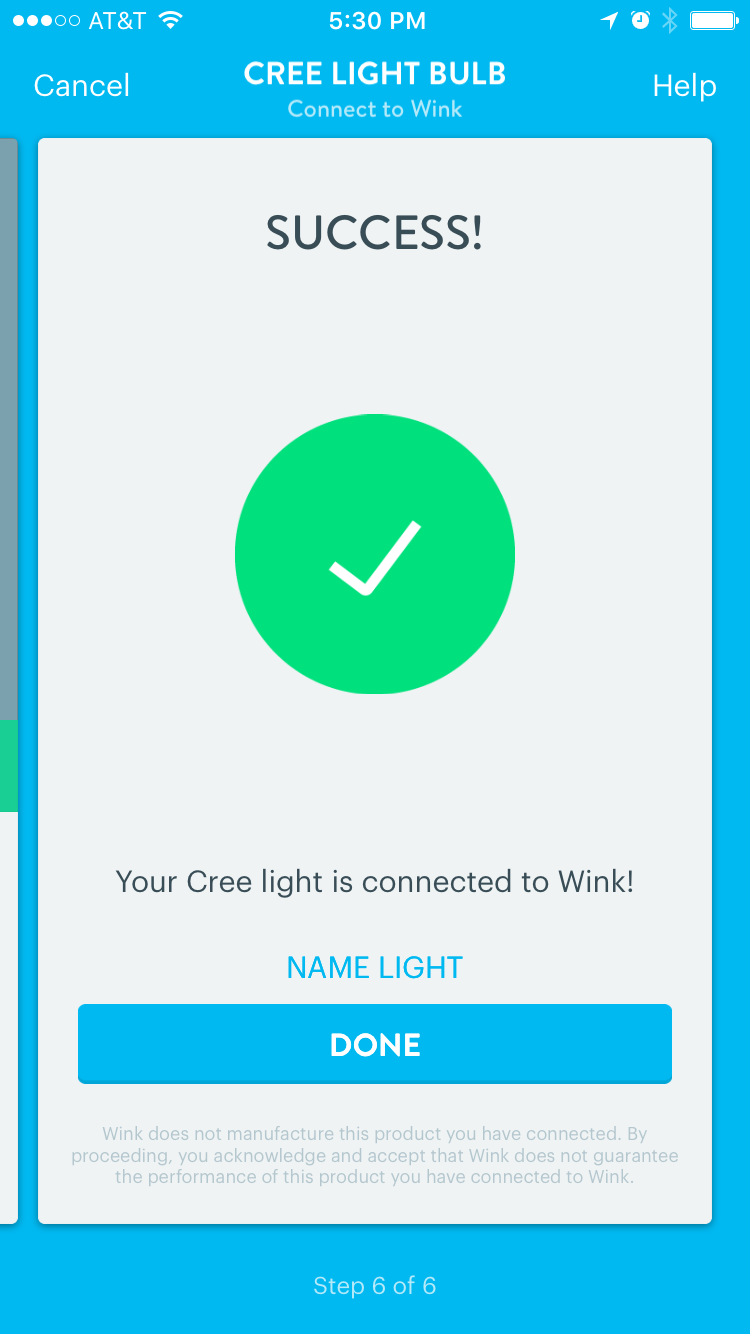
After a moment the light will pair. Select Done.
Add a device: switch
Add a product
In the Wink app Products menu select Add a Product.
Browse by Brands
In this example we'll browse by brands. Scroll down and select Browse by Brands.
Select Leviton

This example uses a Leviton switch. Scroll down to the brand of your switch and select it.
Select the switch model
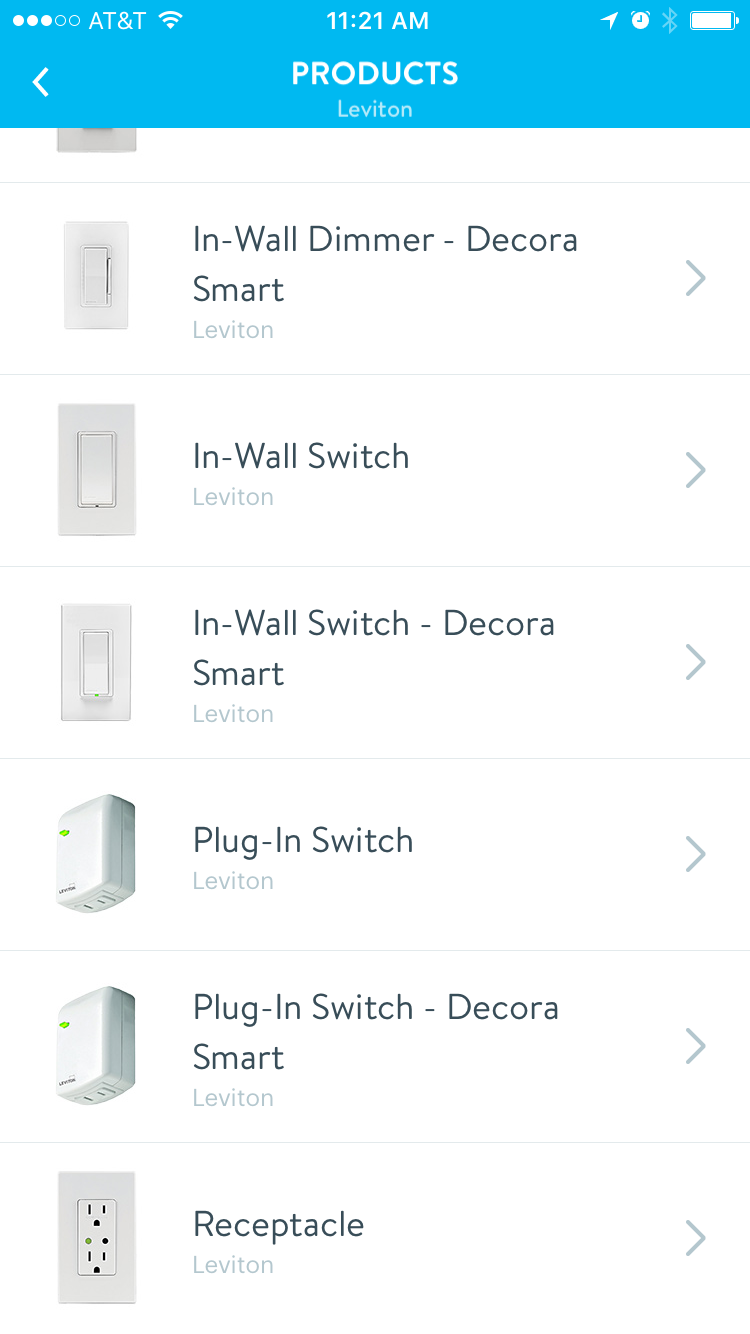
This example uses a Leviton Plug-In switch. Scroll down and select your switch model.
Wink Walkthrough, Step One - Watch video
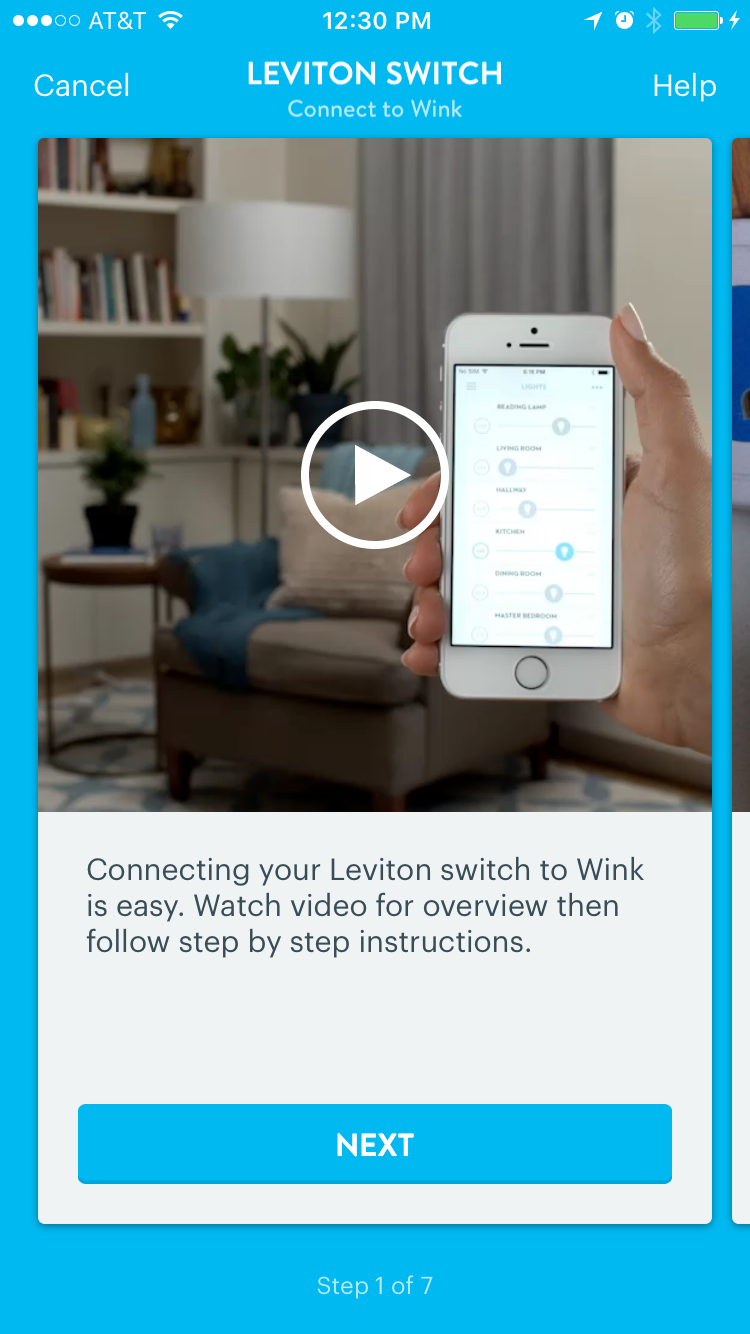
In the app, watch a short video that describes the steps in this tutorial. The select next.
Wink Walkthrough, Step Two - Plug in Switch
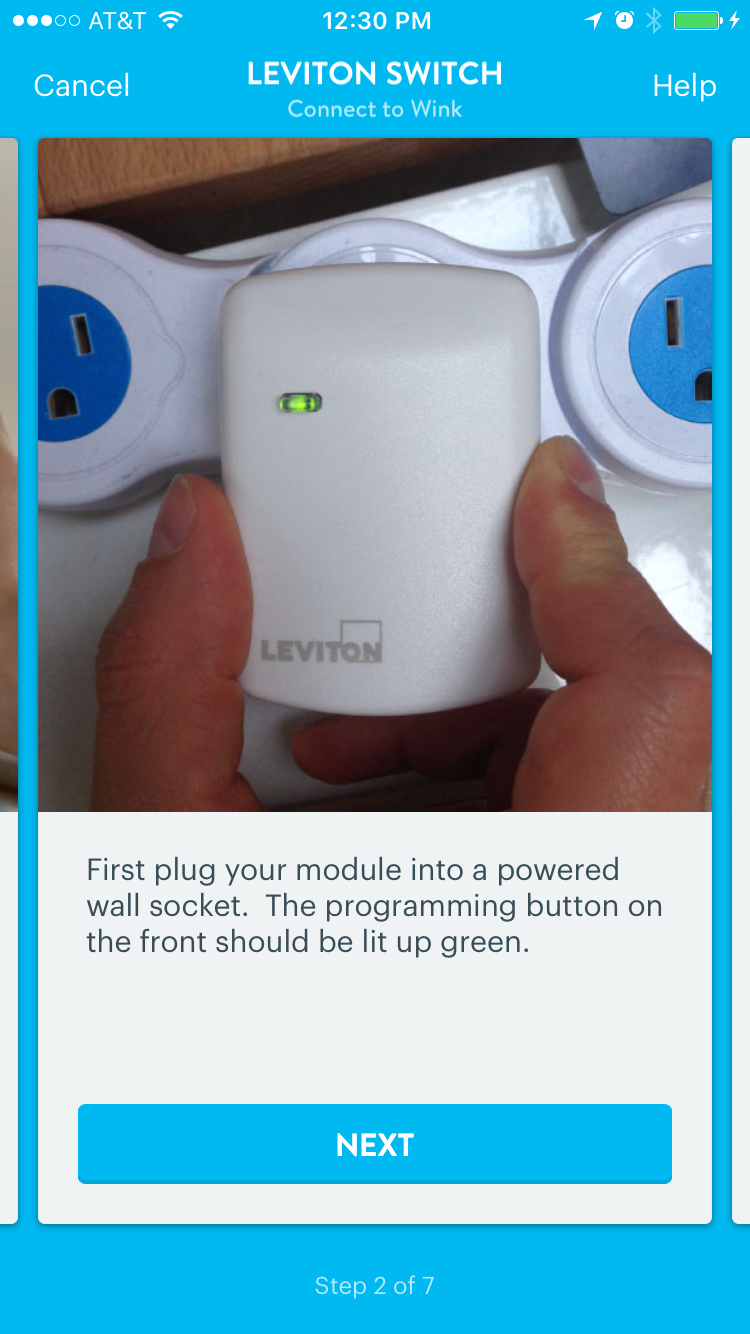
Plug in your switch and select next.
Wink Walkthrough, Step Three - Check Hub
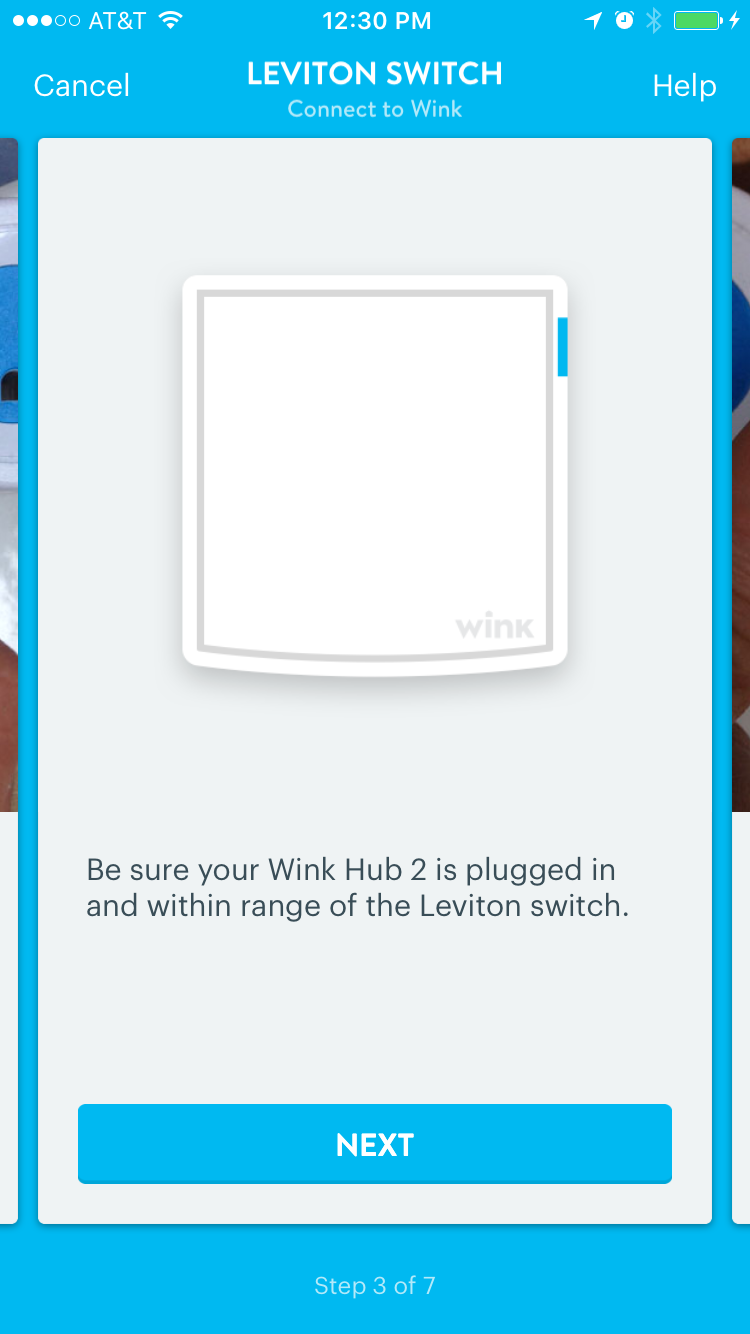
Be sure your Wink hub is plugged in. Select next.
Wink Walkthrough, Step Four - Prepare Devices
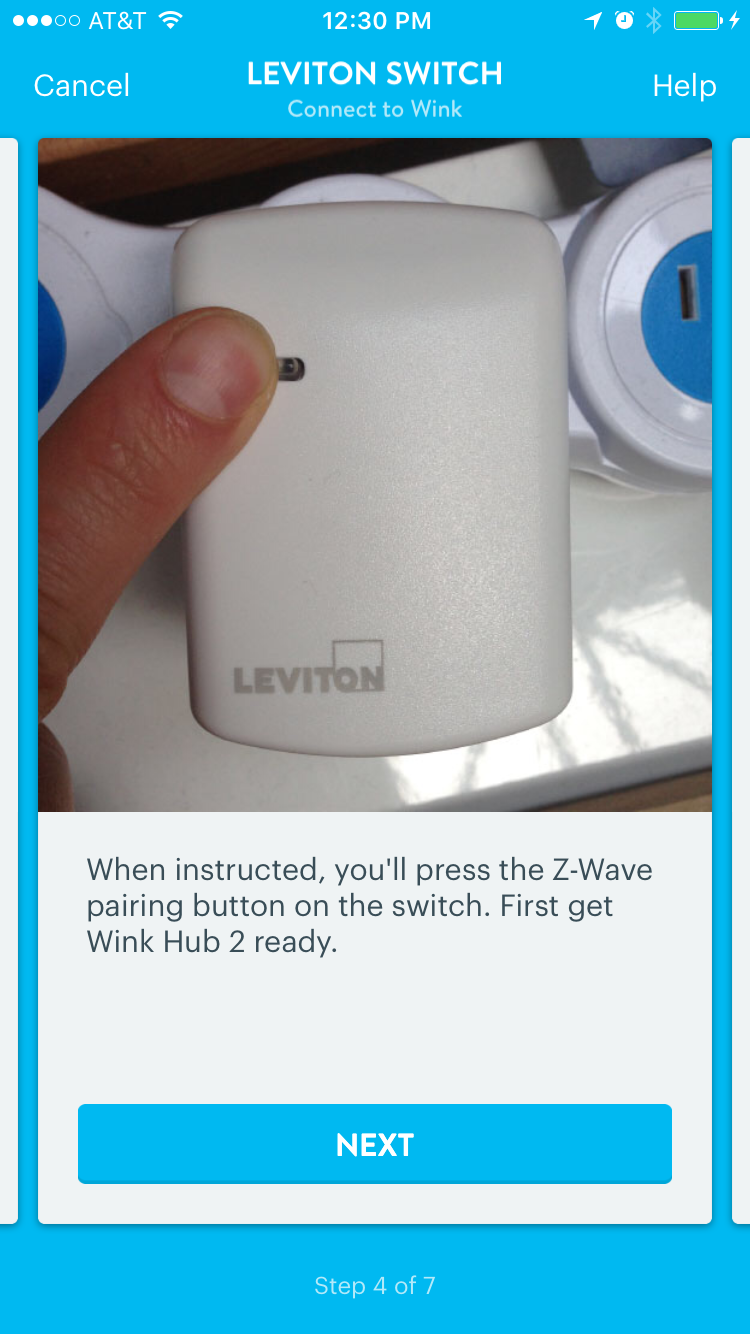
Select next.
Wink Walkthrough, Step Five - Connect to Hub
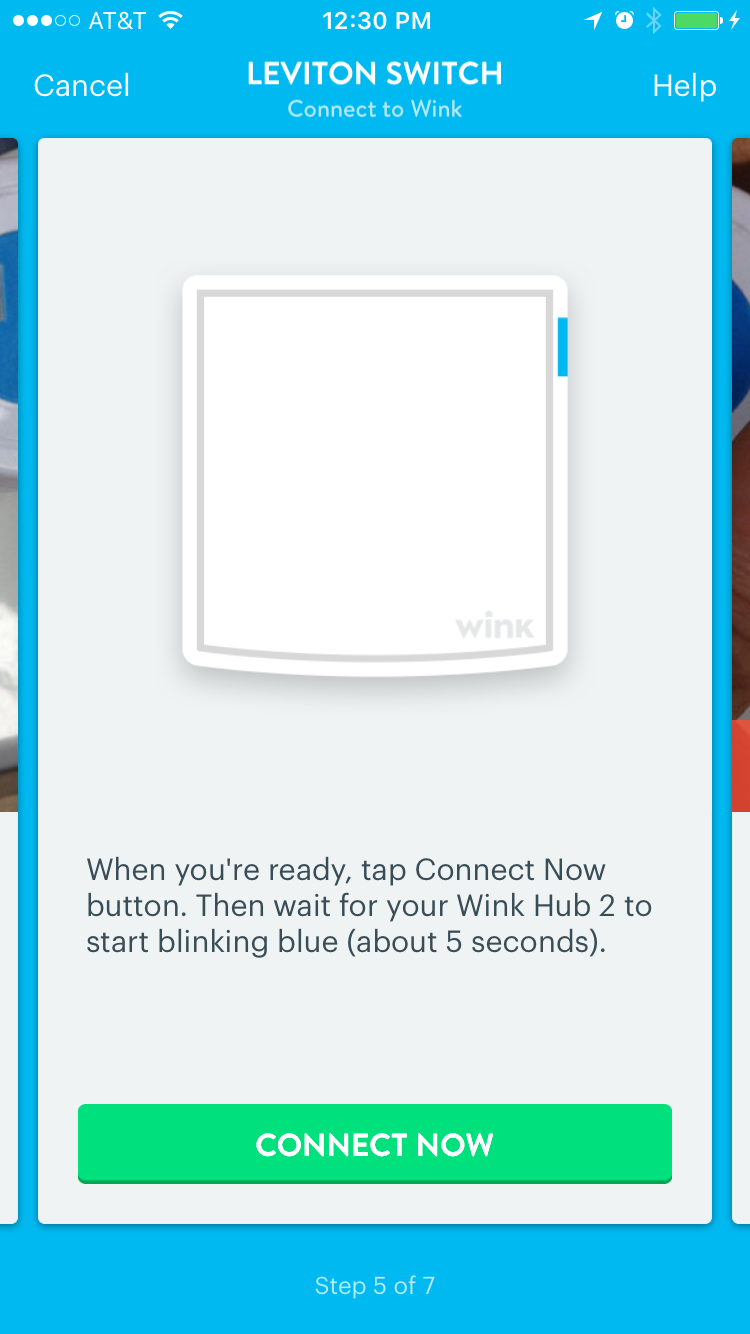
Select Connect Now to put Hub in pairing mode.
Wink Walkthrough, Step Six - Put Switch in Pairing Mode
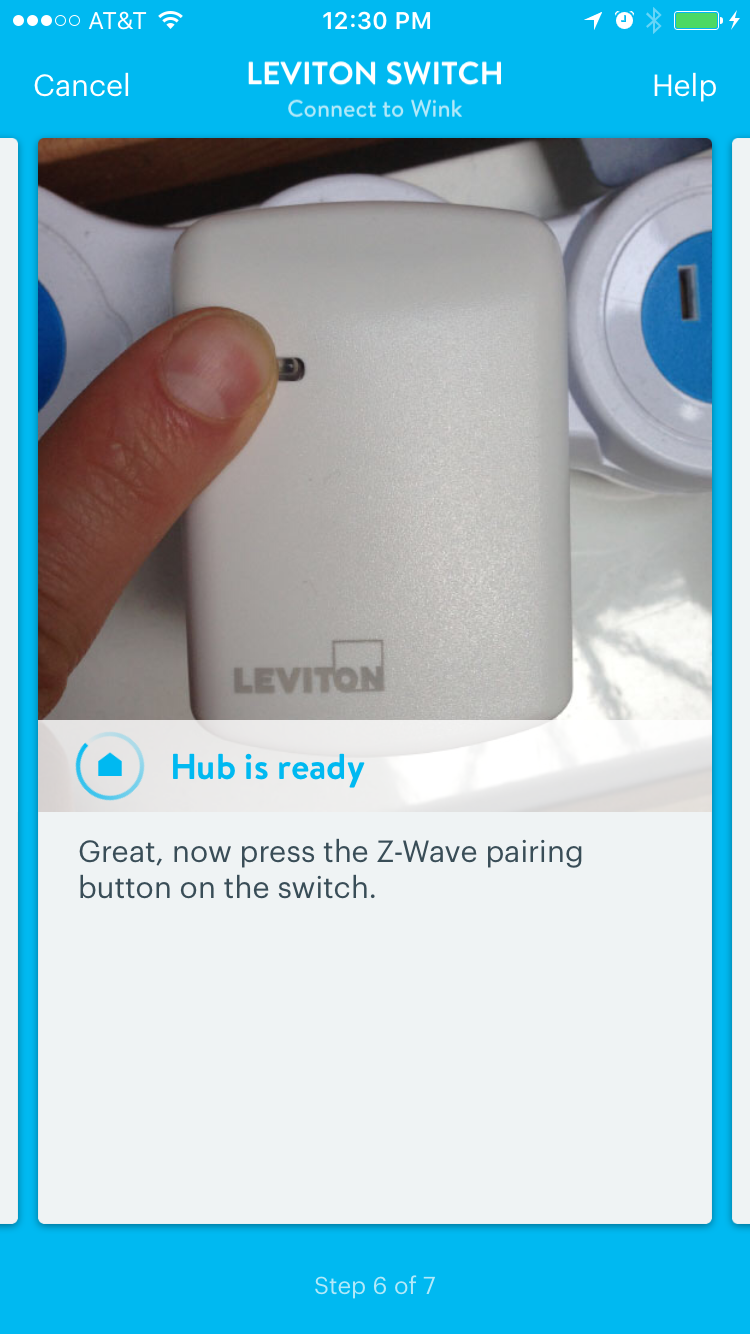
Press the Z-wave pairing button on the switch.
Wink Walkthrough, Step Seven - Success
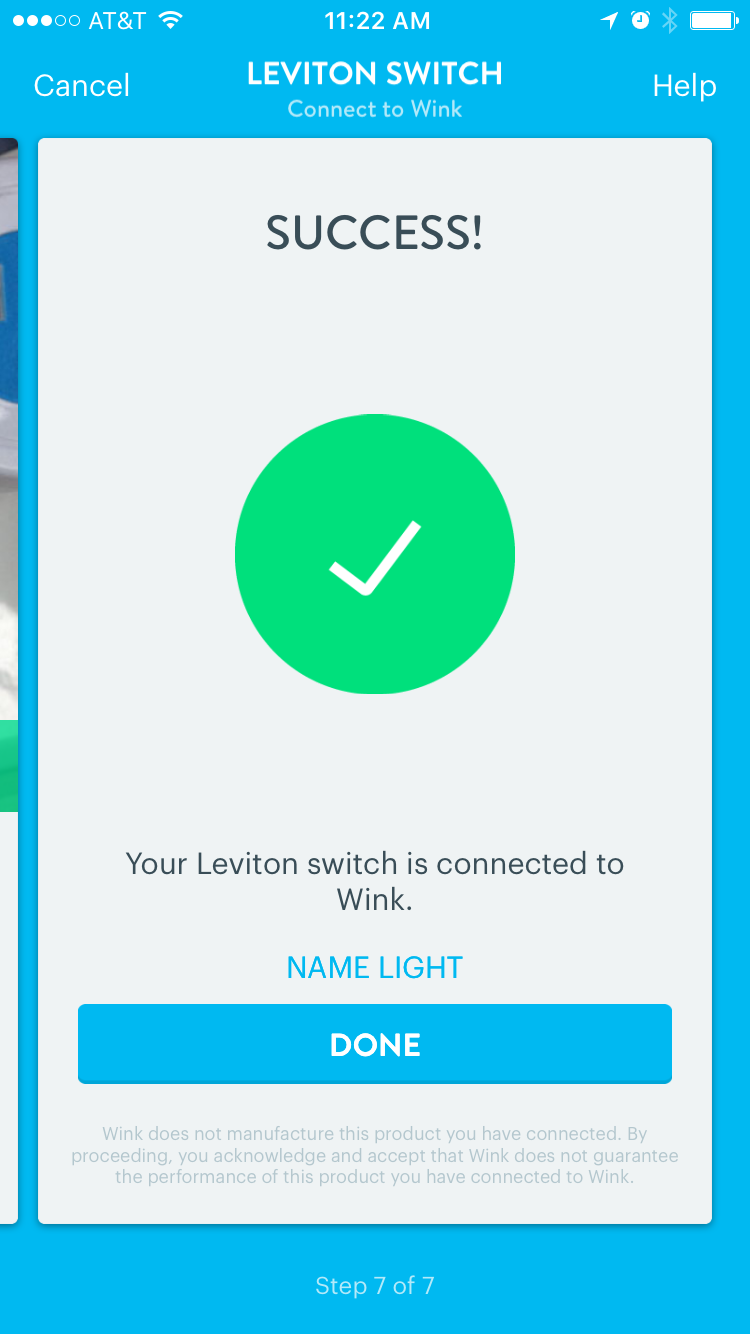
After a moment the switch will pair. You can customize the name. Select Done.
Add a device: lock
Add a product
In the Wink app Products menu select Add a Product.
Select the Safety & Security category

Select the Safety & Security category to find the lock.
Select Locks
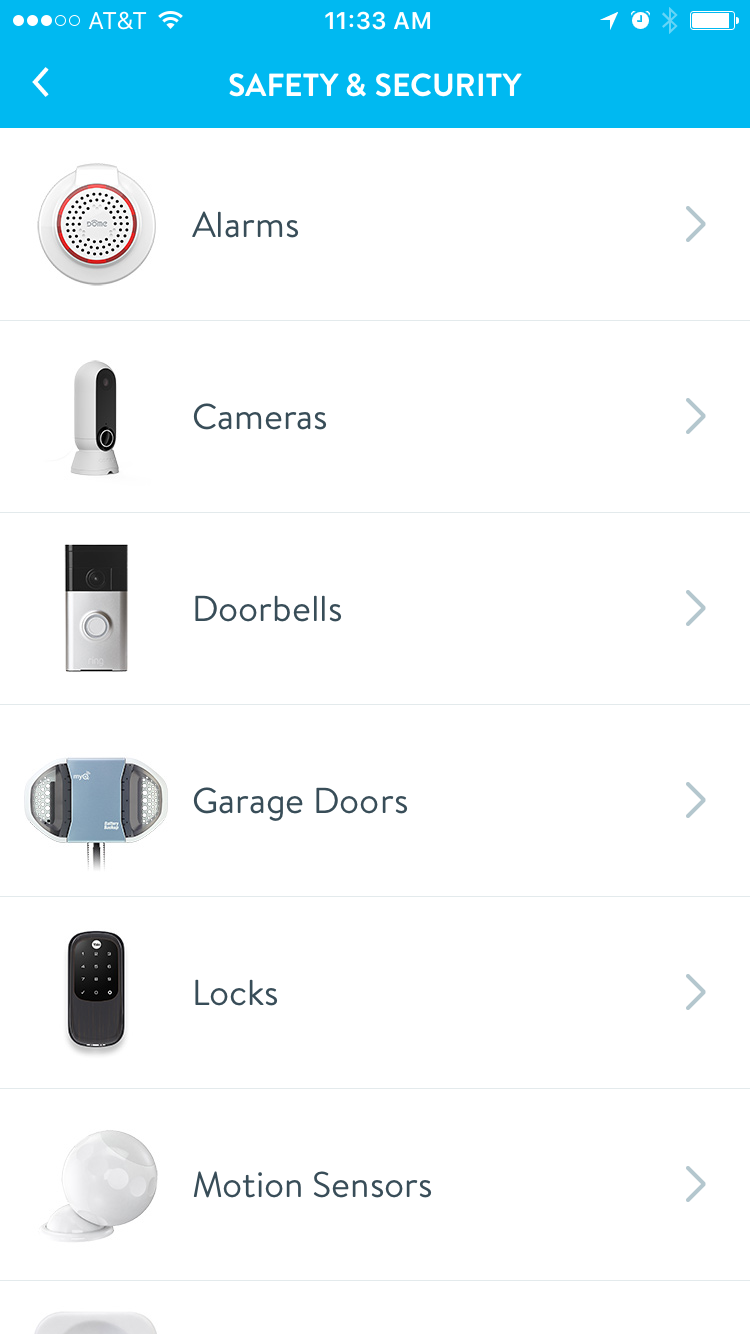
Select Locks.
Select the lock model

This example uses a Schlage BE469 lock. Select your lock model.
Wink Walkthrough Step One - Watch a video
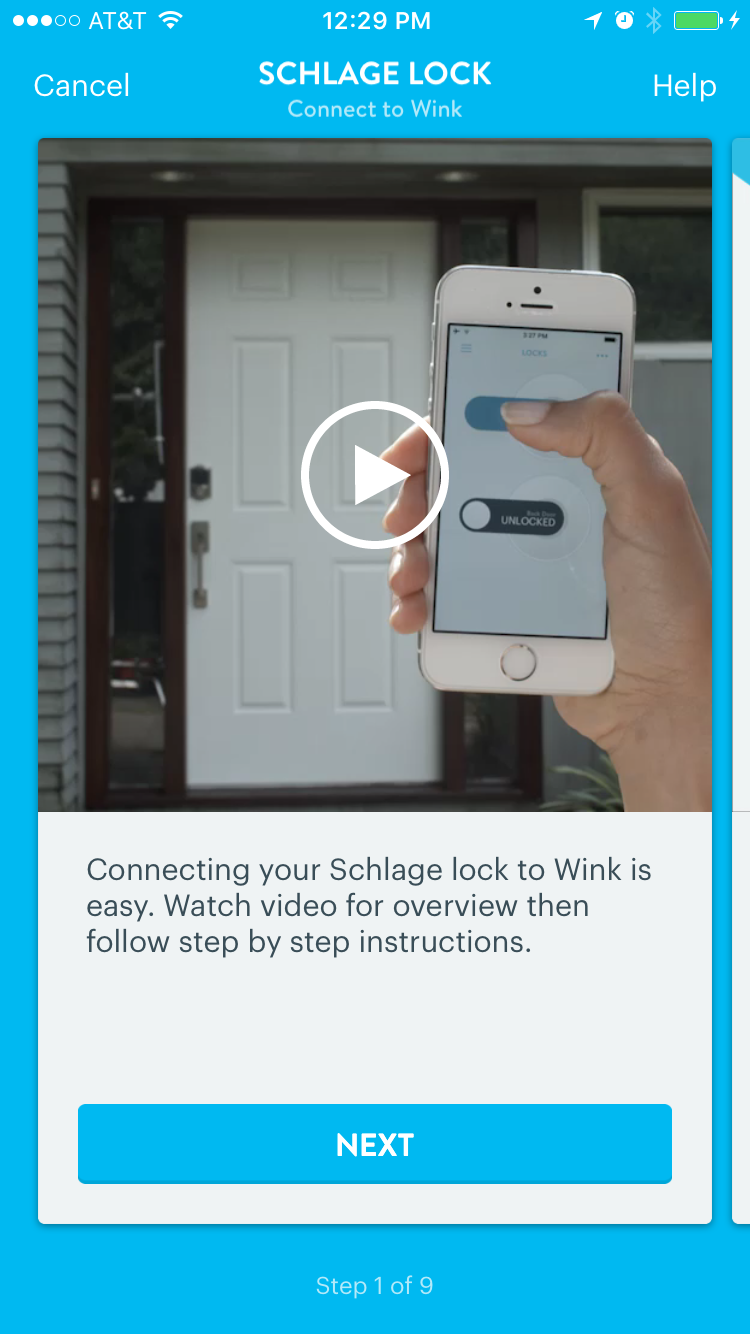
In the app, watch a short video of steps in this tutorial. Select next.
Wink Walkthrough Step Two - Check battries
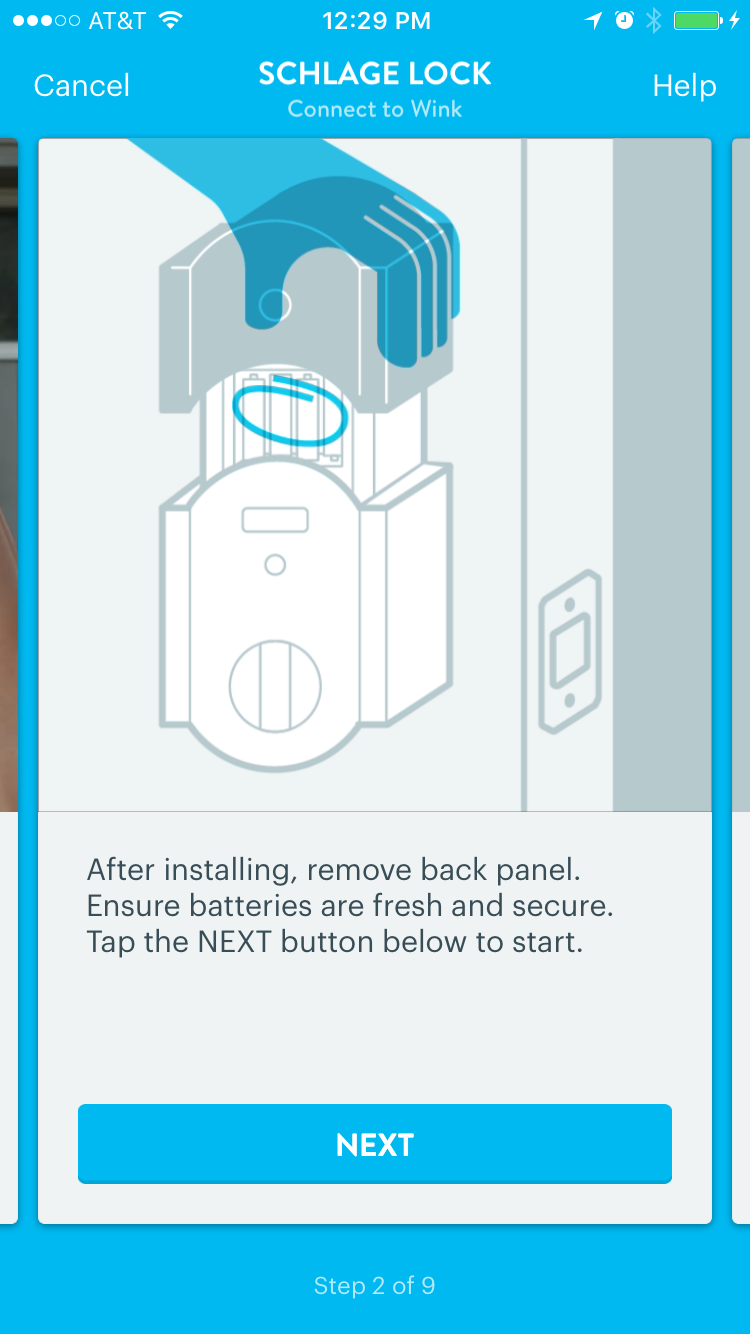
Follow the instructions to check the batteries for the lock. Select next.
Wink Walkthrough Step Three - Extend bolt
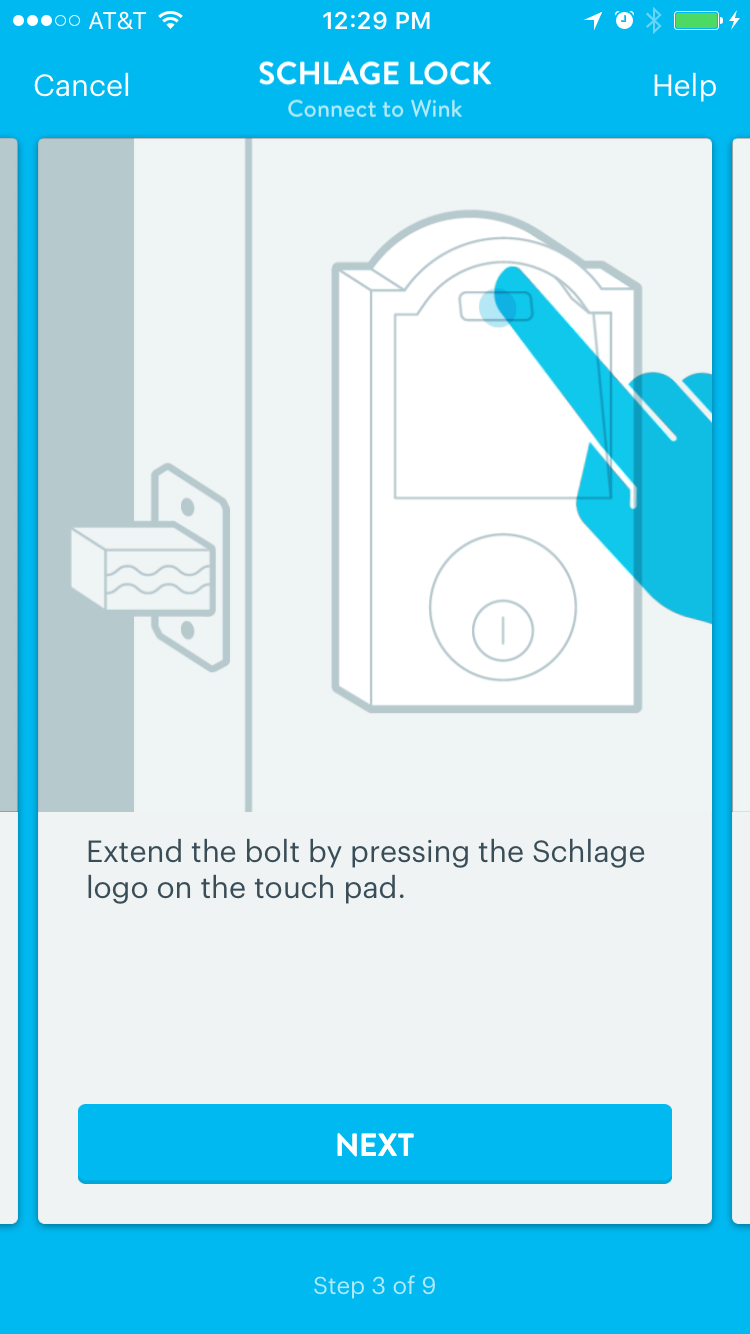
Extend the bolt by pressing the Schlage logo. Select next.
Wink Walkthrough Step Four - Find Programming Code

Locate your programming code on the back of your lock's user guide. Select next.
Wink Walkthrough Step Five - Plug in hub

Check that hub is plugged in. Select next.
Wink Walkthrough Step Six - Prepare
Prepare to pair devices. Select next.
Wink Walkthrough Step Seven - Put hub in pairing mode
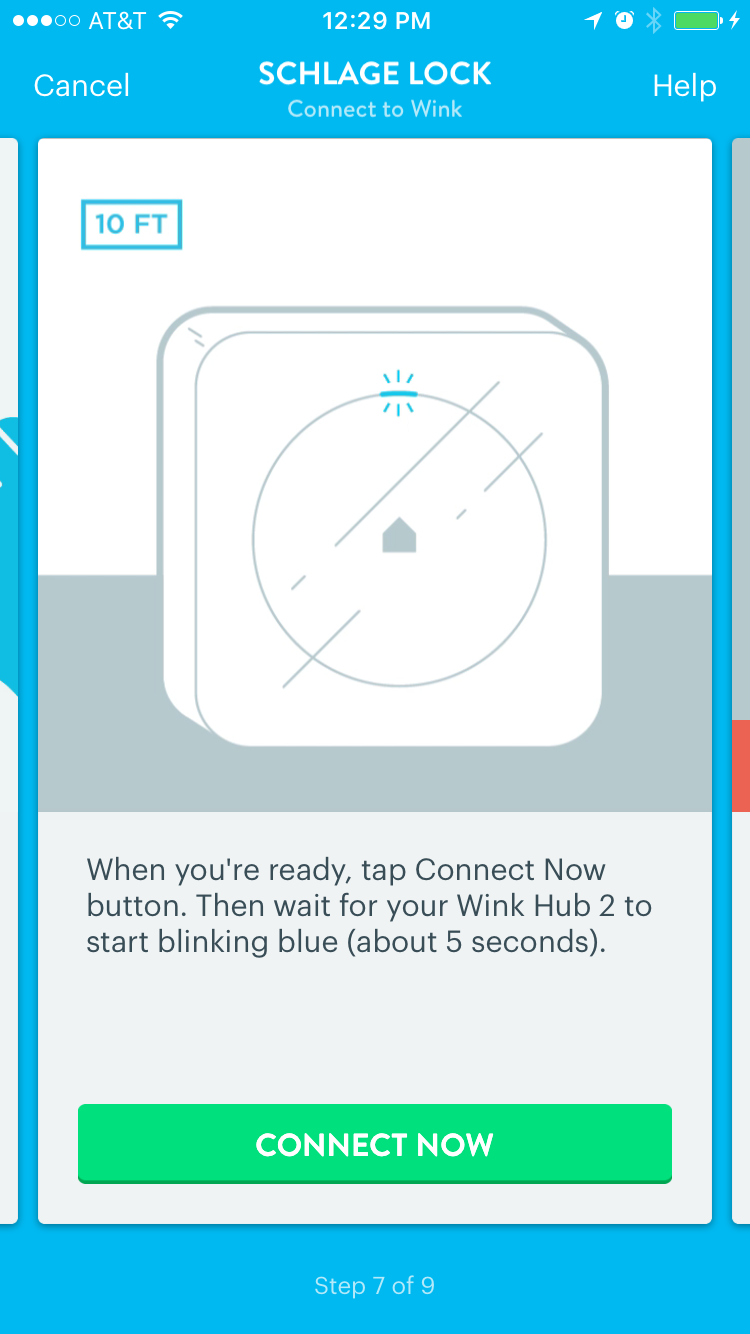
Select Connect Now to put hub in pairing mode.
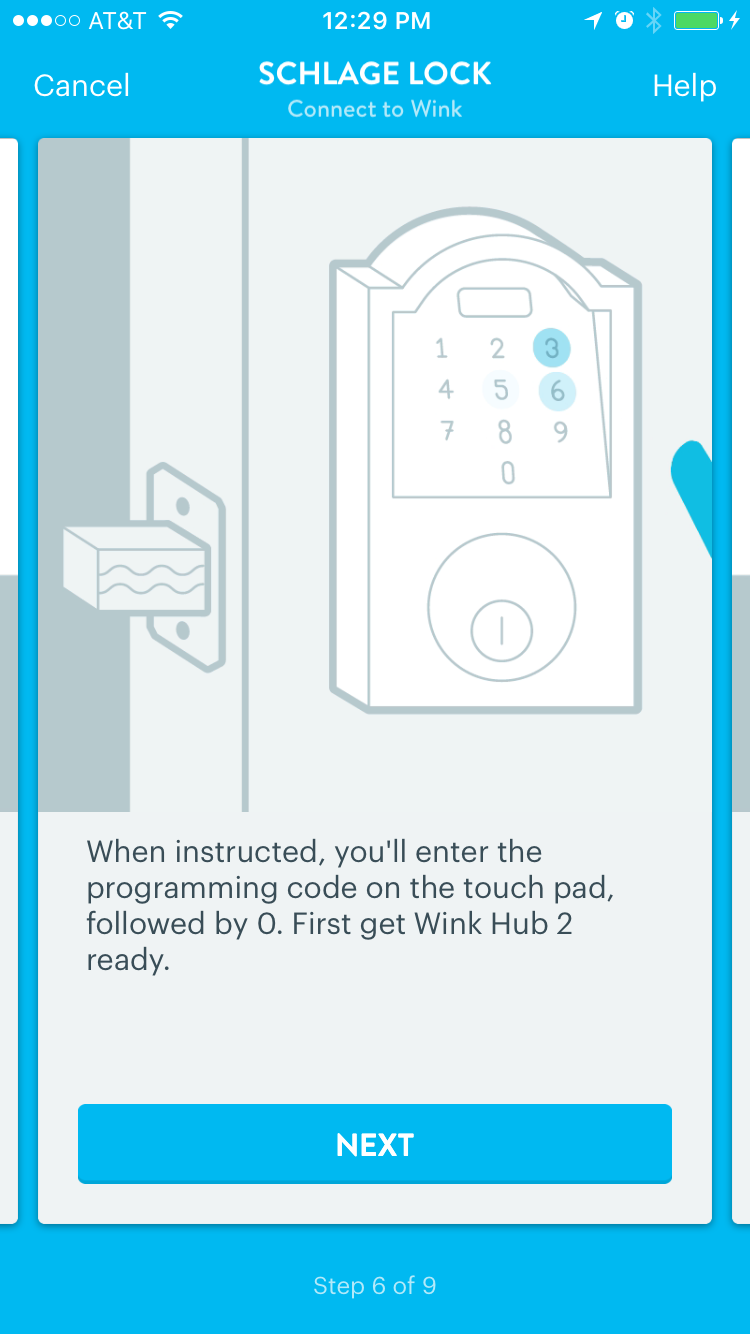
Wink Walkthrough Step Eight - Put lock in pairing mode
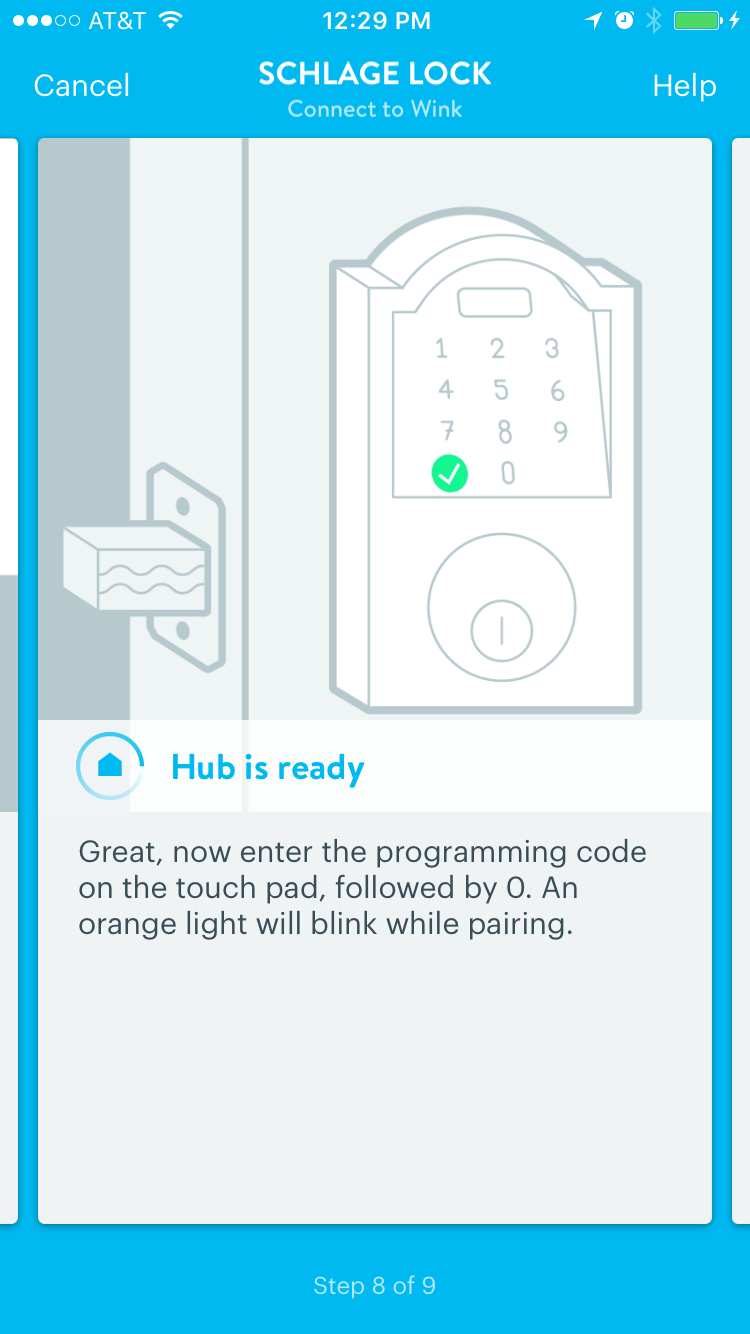
Enter the programming code into the lock on the touch pad, followed by zero.
Wink Walkthrough Step Nine - Success
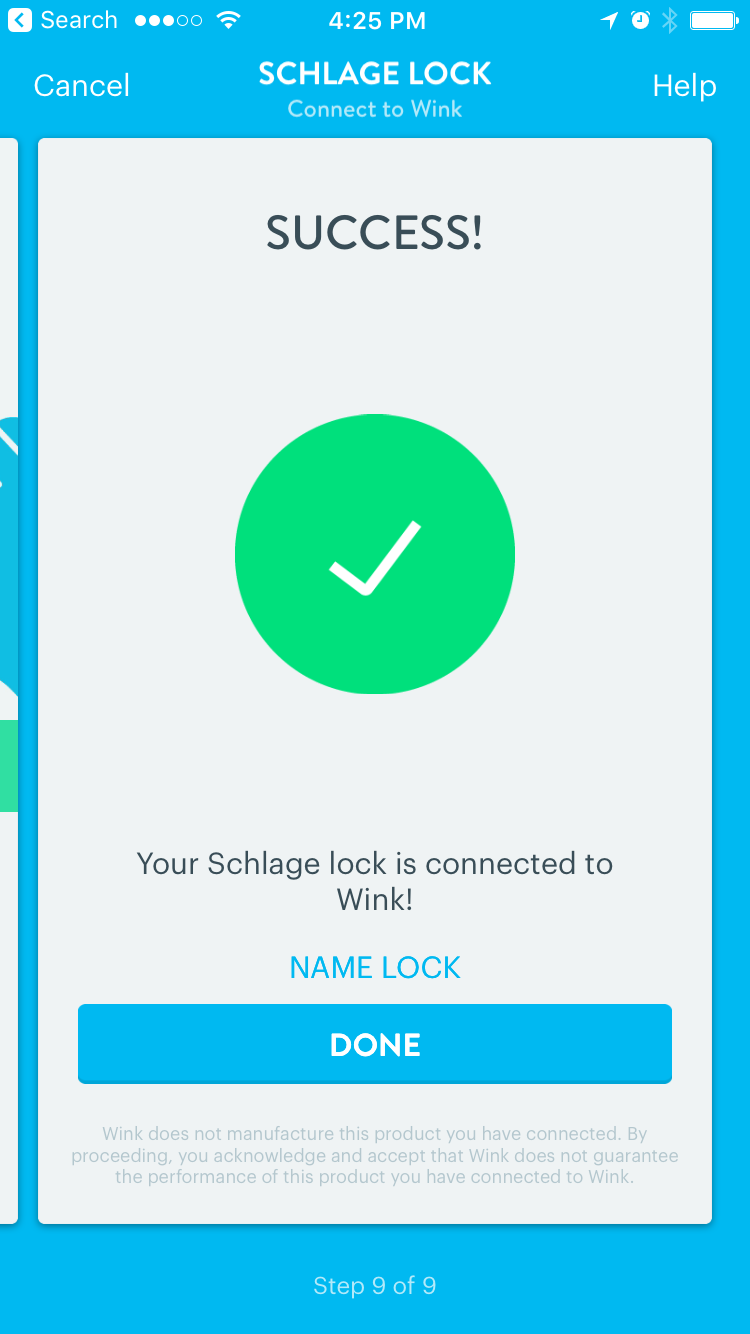
Success! You may now customize the name and settings for the lock. Select Done.
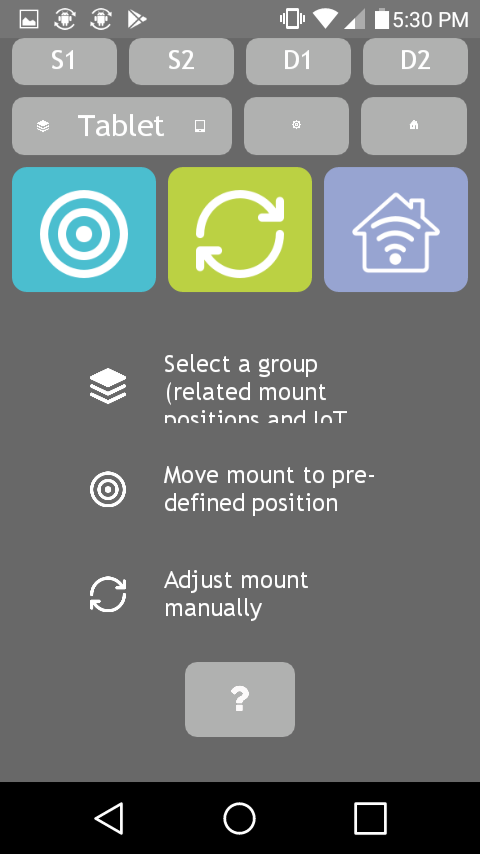
Access Wink devices through the Pow!r Mount app
Open Power Mount app
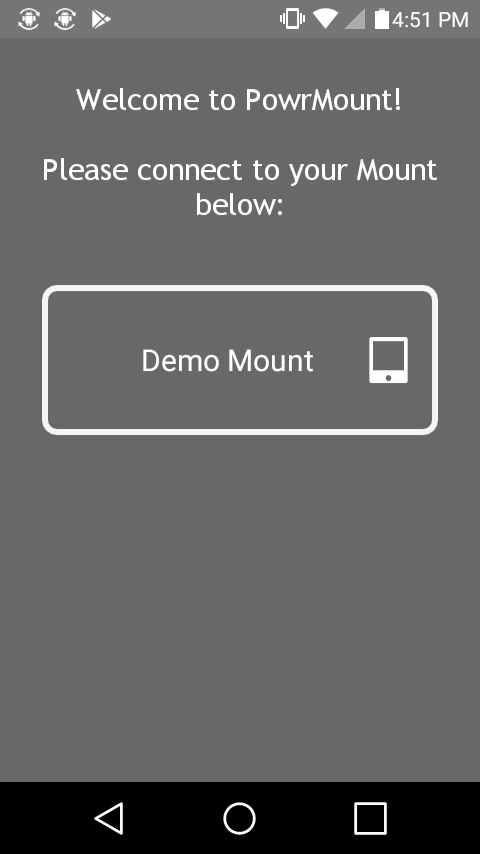
Open the Power Mount app. Connect to your Power Mount, or select Demo Mode.
Select settings
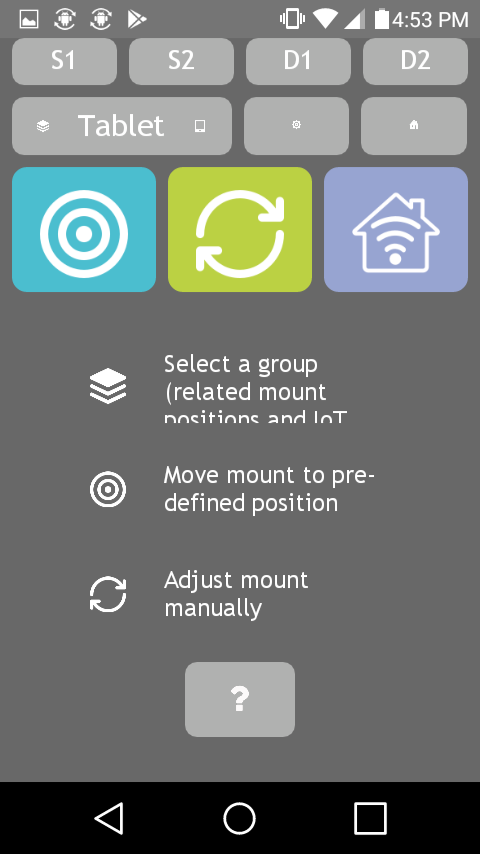
In the home screen select the gear icon to access settings.
Select IoT Settings
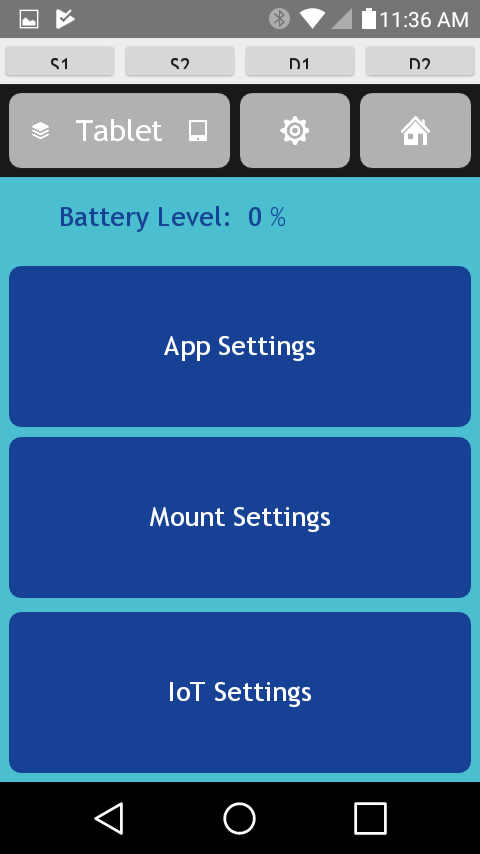
In the settings menu select IoT Settings.
Select Connect Wink Account
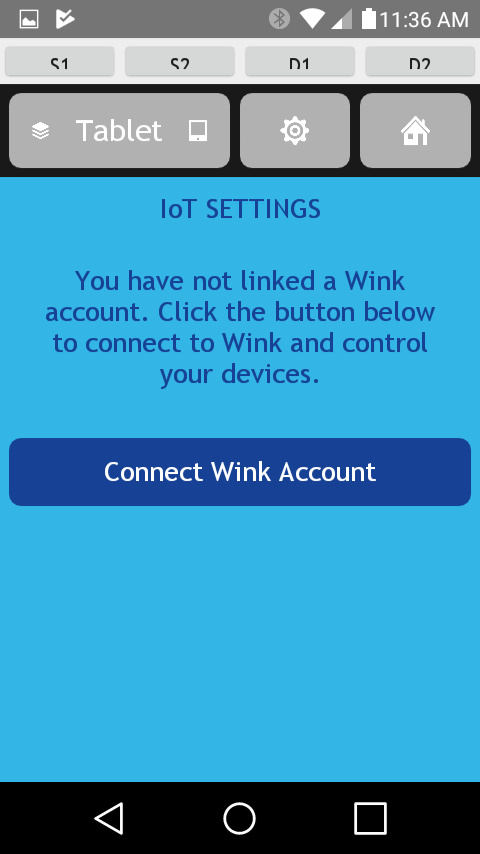
Select Connect Wink Account to open a login screen for Wink.
Sign in to Wink
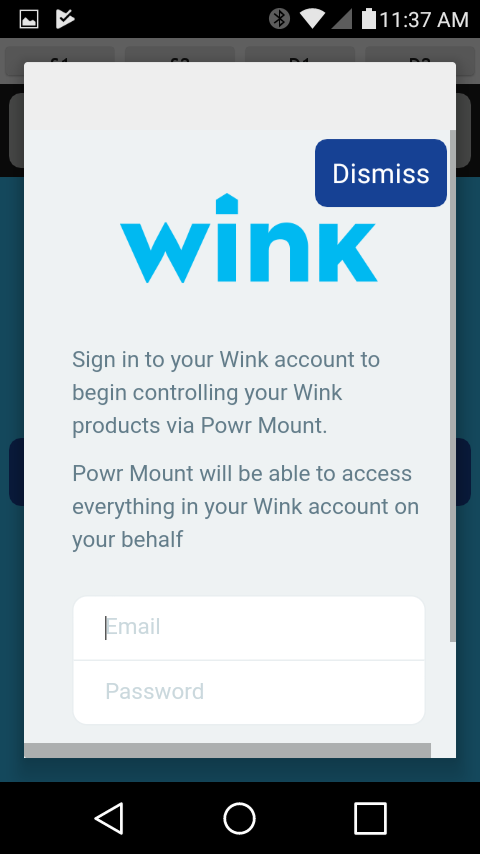
Enter the email and password you used to create your Wink account. Note that this must be the primary Wink account to see all devices. Accounts that have shared access will not see all devices.
IoT Settings with Wink Linked
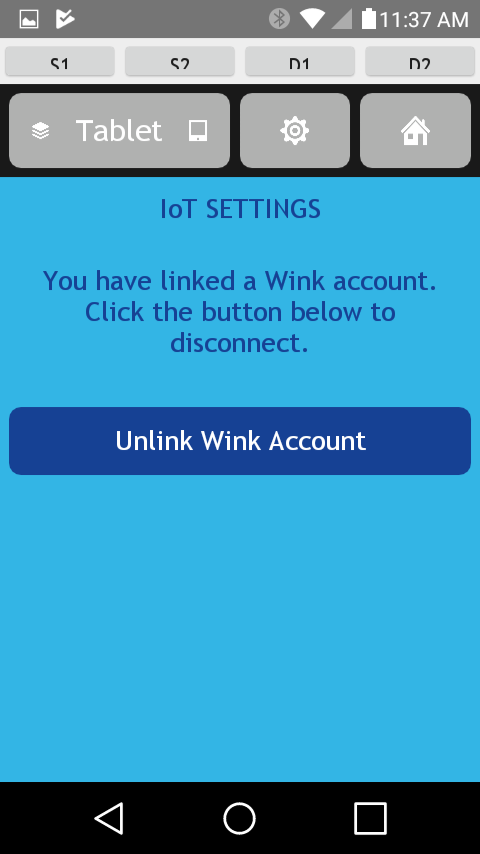
The app will return to the IoT settings screen showing that you have a linked Wink account. Select the home icon.
Change App Settings so IOT Devices are available

The IOT Devices are Locked, so the IOT Tab will not appear on the Home Page.
Change the IOT Device Status to Open

This will result in the IOT tab appearing on the Home Page.
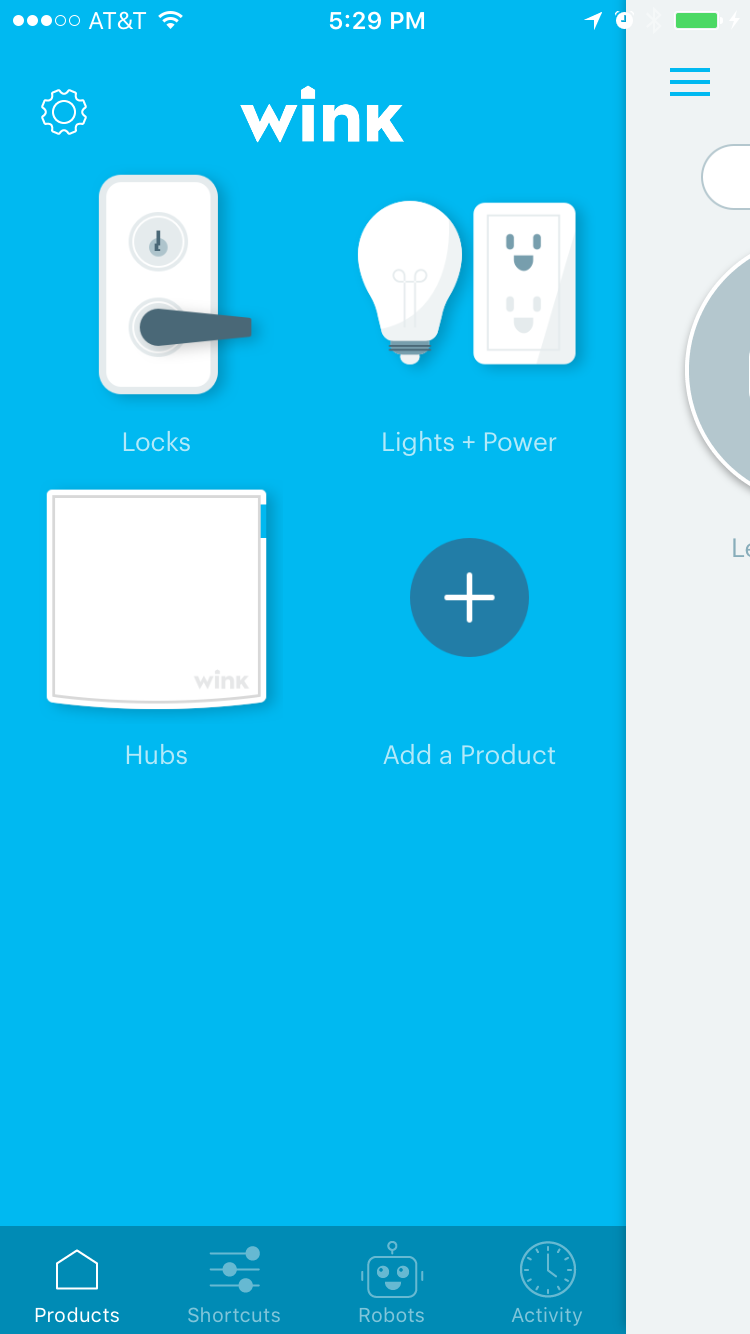
Access Wink devices

Wink devices are controlled through the menu accessed with the house icon. Select the house icon.
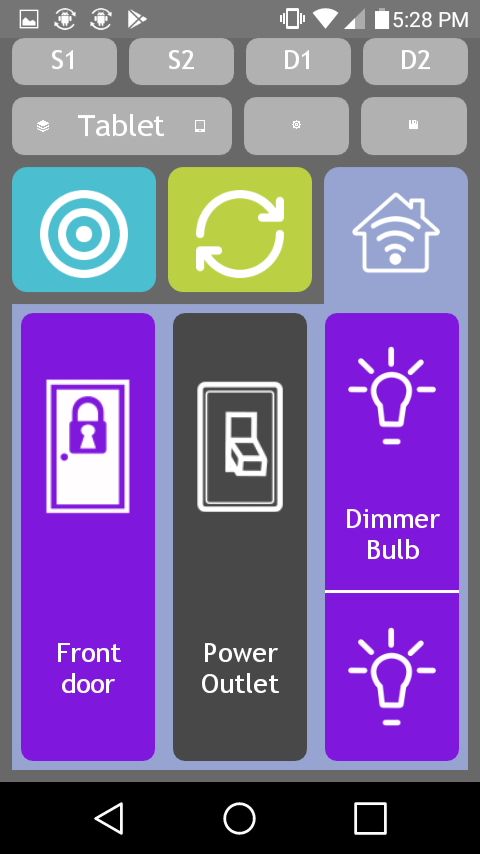
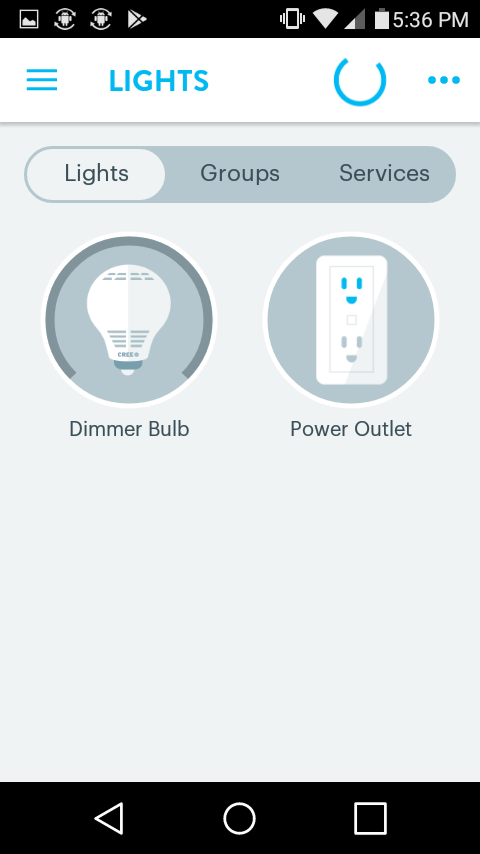
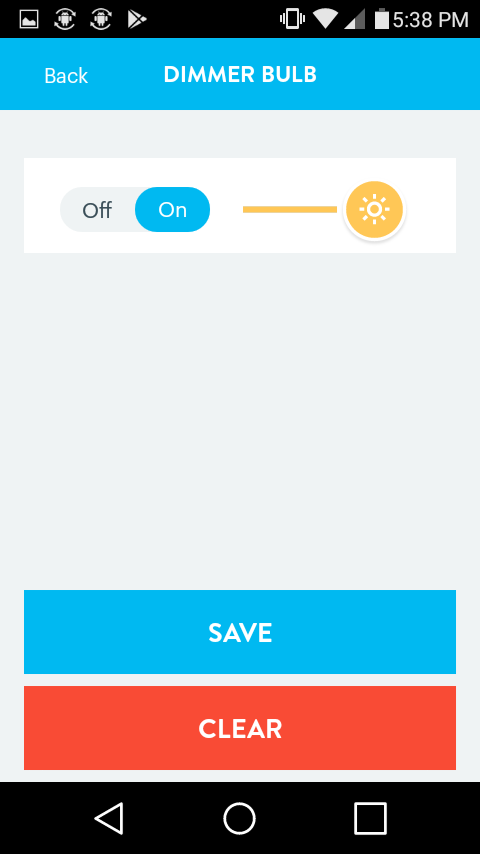
Wink devices
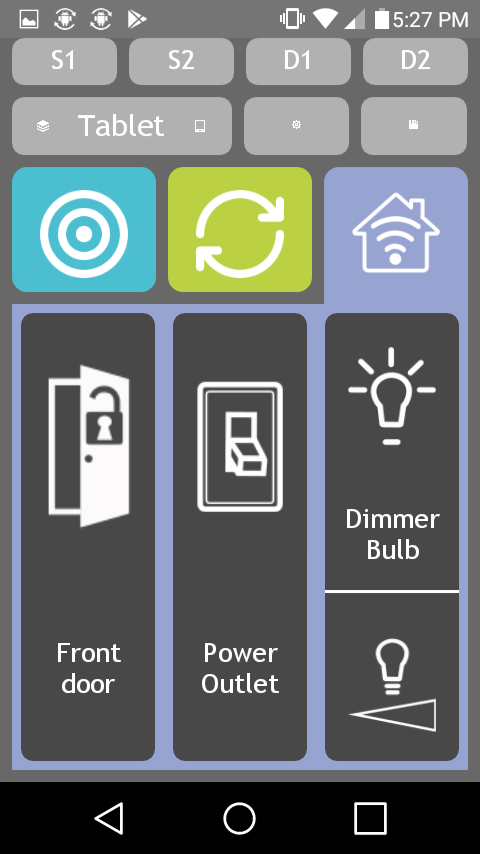
The icon for each Wink devices indicates the state. Here the switch is off, the lock is unlocked, and the light bulb is off. In this example select the dimmer bulb icon to turn on the light.
Lock the lock
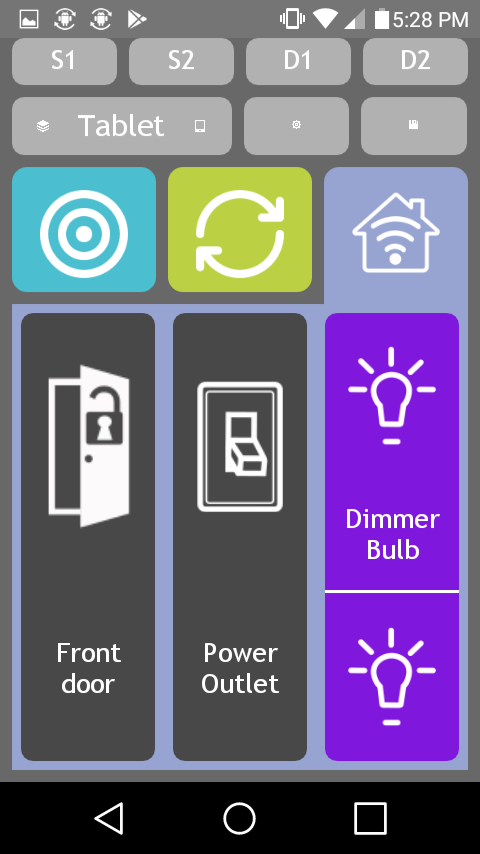
This screen show the dimmer bulb turned on. Select the door icon to lock it.
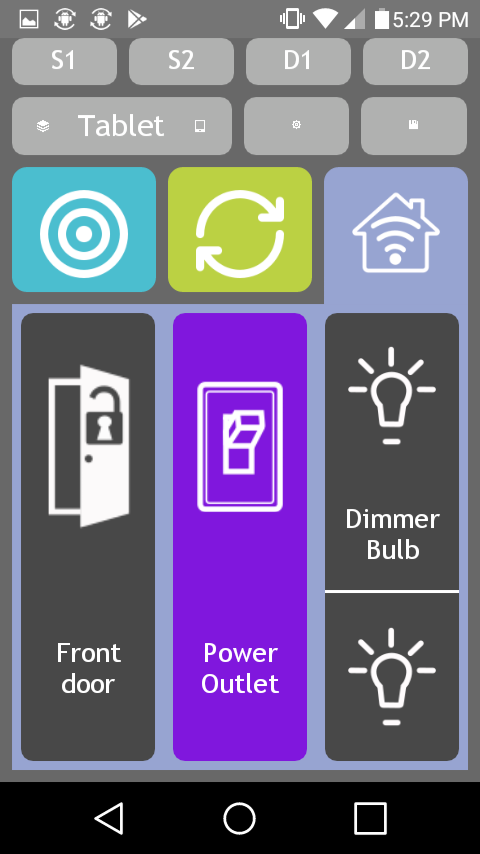
Monitor and change device status
This screen shows the door locked and the light on. Select the door to unlock it and select the light to turn it off. Then select the power outlet to turn it on.
Power outlet is on
This screen shows the result of selecting each icon once. The power outlet is on, the door is unlocked, and the light is off.
Add a device to a Targets page.
Start at the home screen
Select the settings icon, the gear.
Select Mount Settings

Select Mount Settings to edit a group of targets.
Select Edit Groups
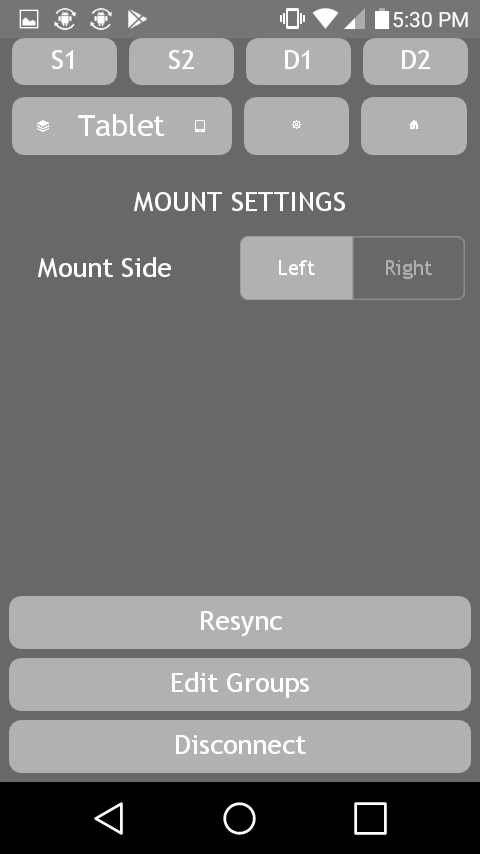
Select Edit Groups
Select a group
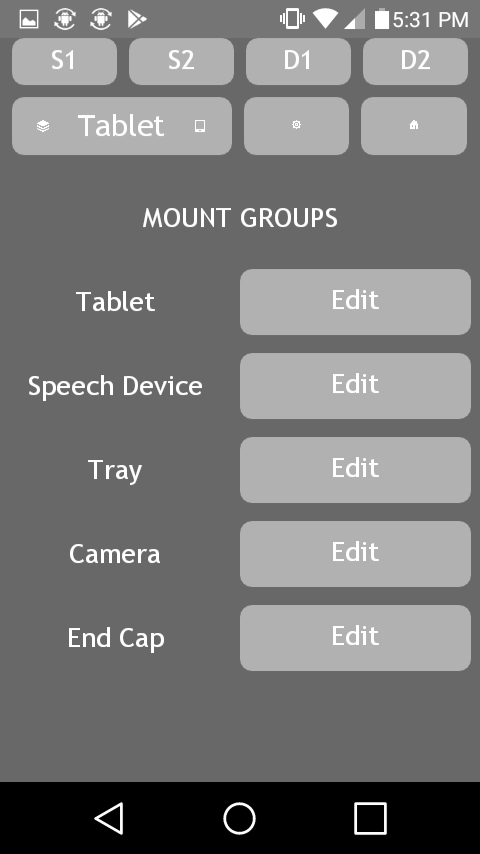
Select the group you want to add an IoT device to. This example uses the Tablet group.
Select Edit IoT Devices
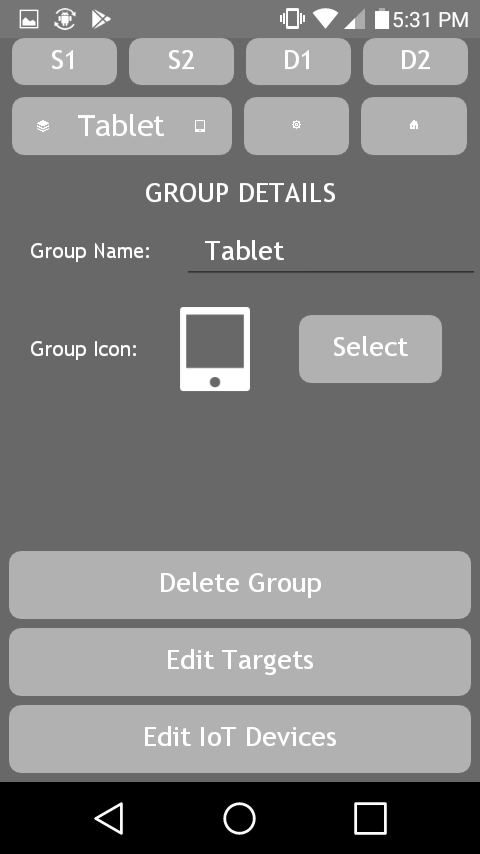
Select Edit IoT Devices
Select the +
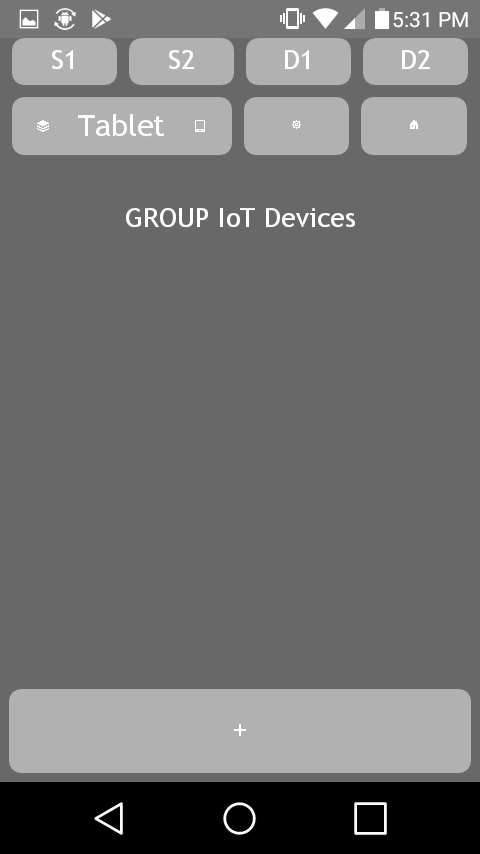
Select the + at the bottom of the screen to add a device.
Select an IoT Device
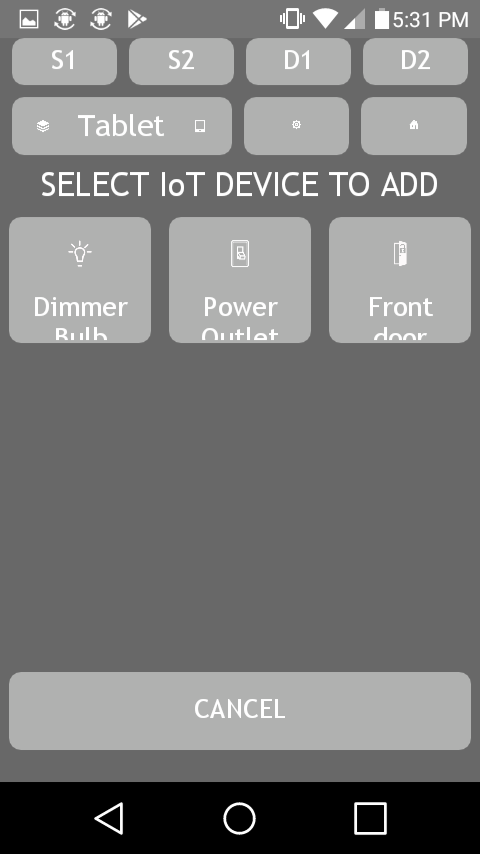
Select the IoT Device you wish to add. This examples uses the power outlet.
IoT Device added
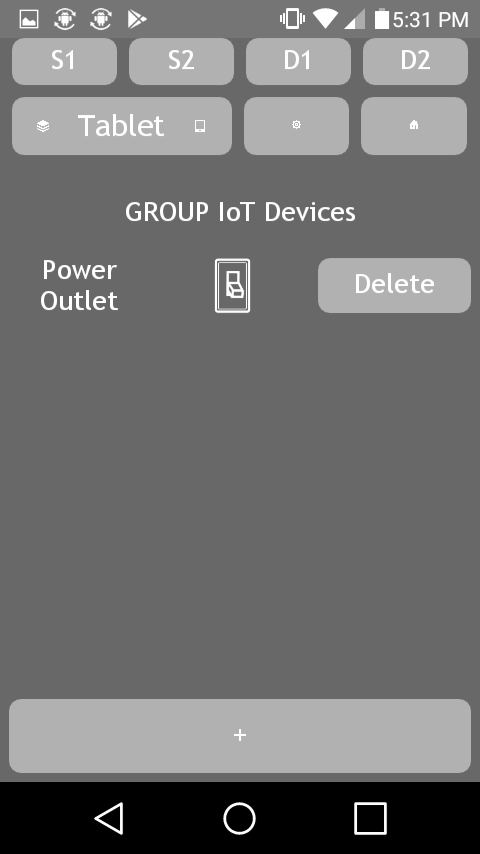
The IoT device now appears in the group settings list. Select the home button.
Select the target group
Select the target icon to go to the target group where you added the IoT device.
Control the IoT device
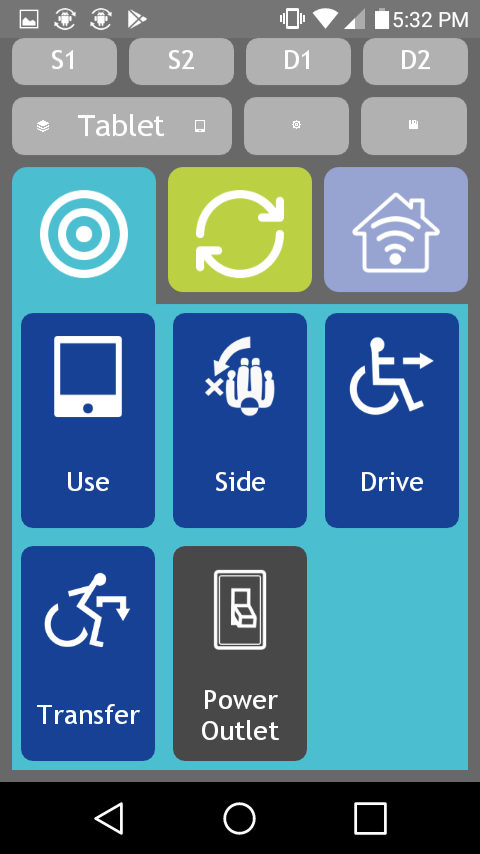
The icon to control the IoT device now appears in the target group.
Combine 2+ actions in one button
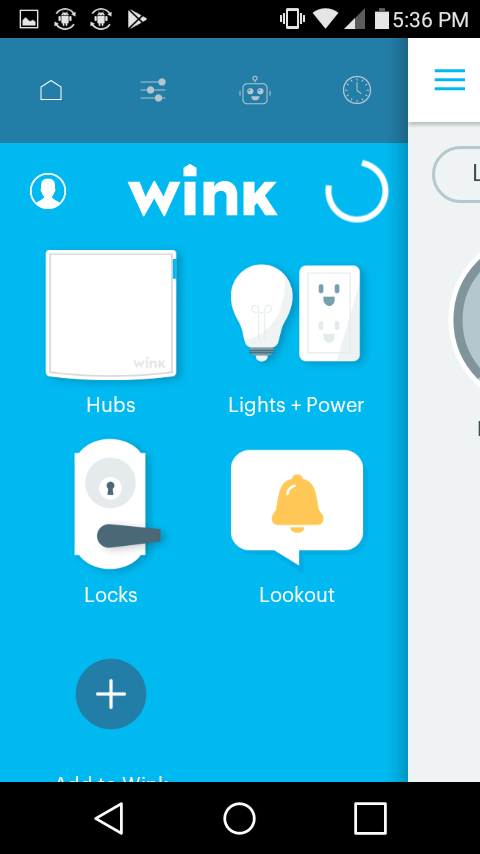
Open the Wink app
Open the Wink app then select the three line icon in the top left to view other options.
Swipe left
From the devices screen swipe left to go to the shortcuts screen.
Add shortcut
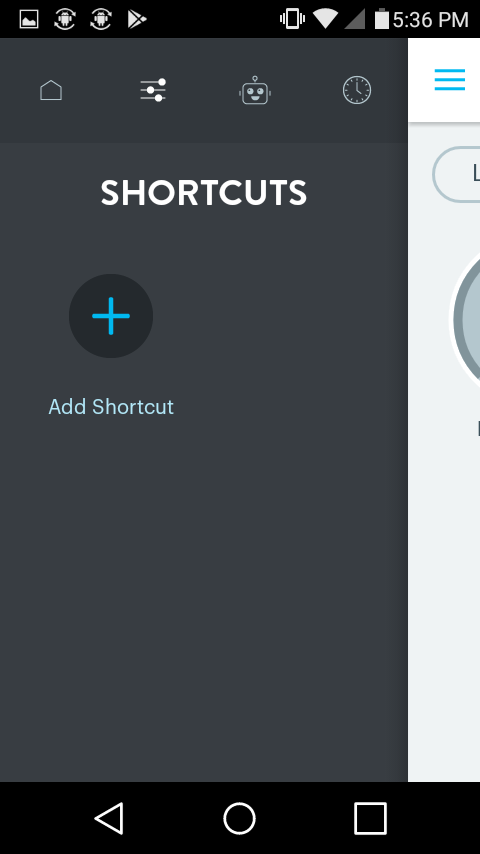
Click the Add Shortcut icon
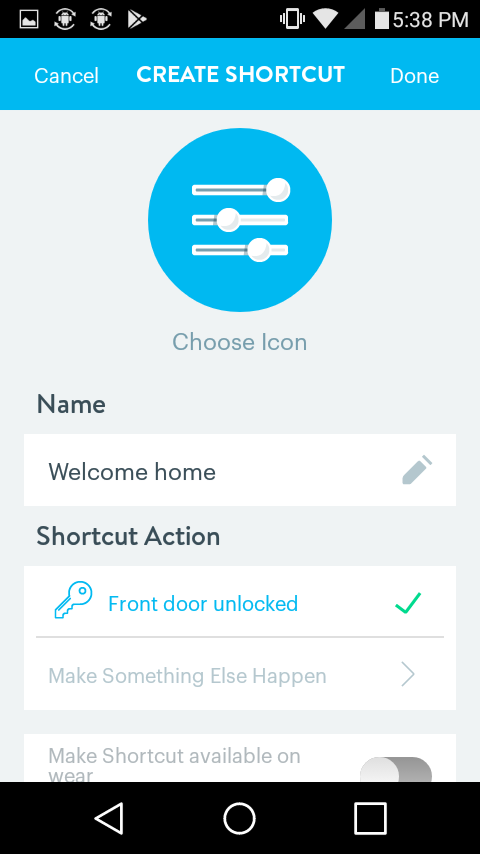
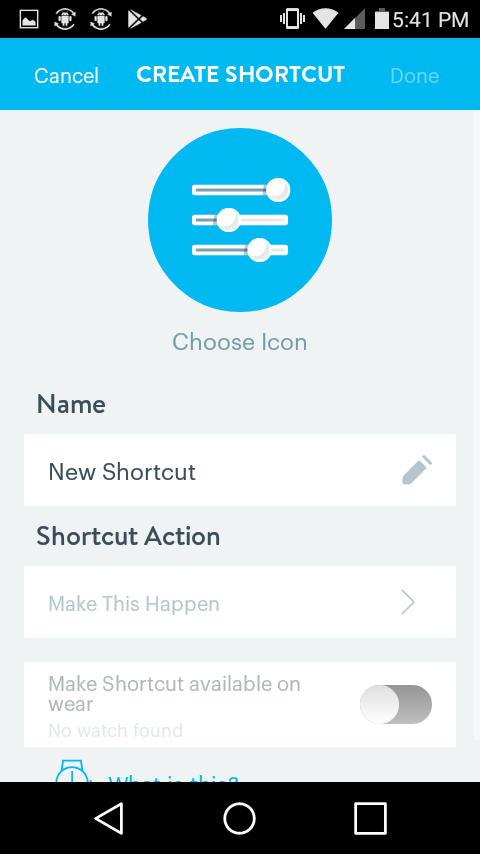
Edit the shortcut name
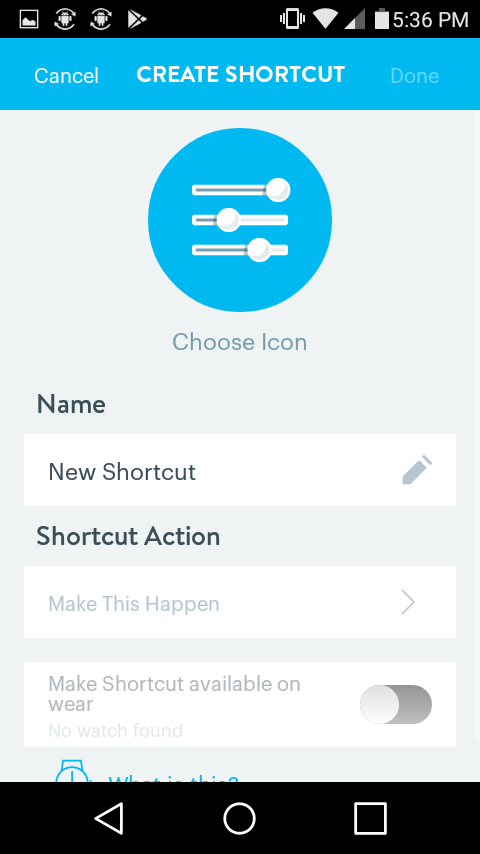
In the create shortcut page click the "New Shortcut" text to edit the name.
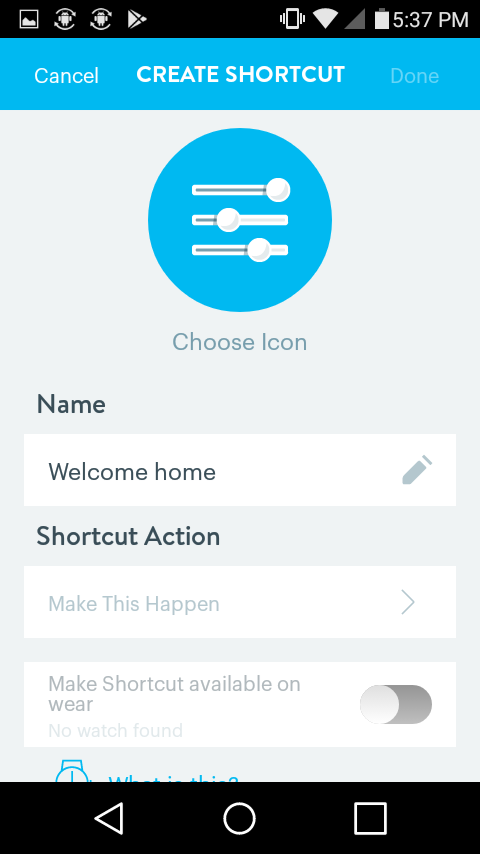
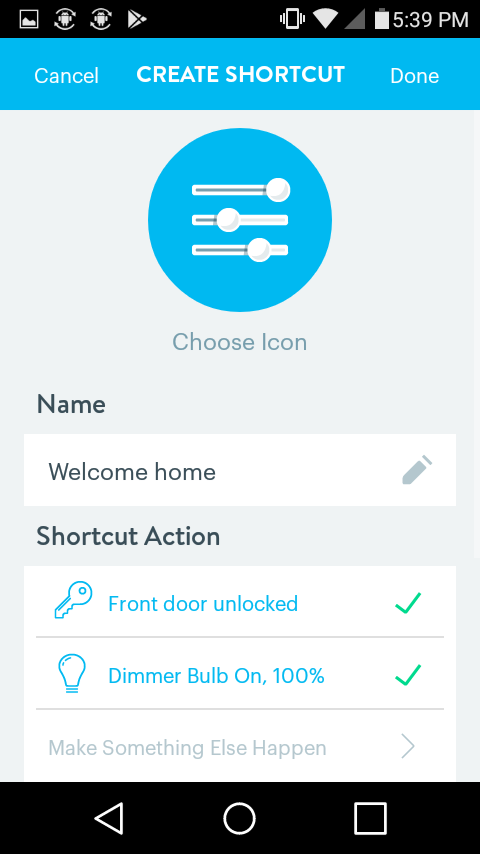
Change the name of the shortcut

Change the name to describe what you want the shortcut to do. This text will show up in the Pow!r Mount app. In this example we create a shortcut that opens the door and turns on the light named "Welcome home".
Add an action
Back in the create shortcut screen click "Make This Happen" to add an action.
Select door
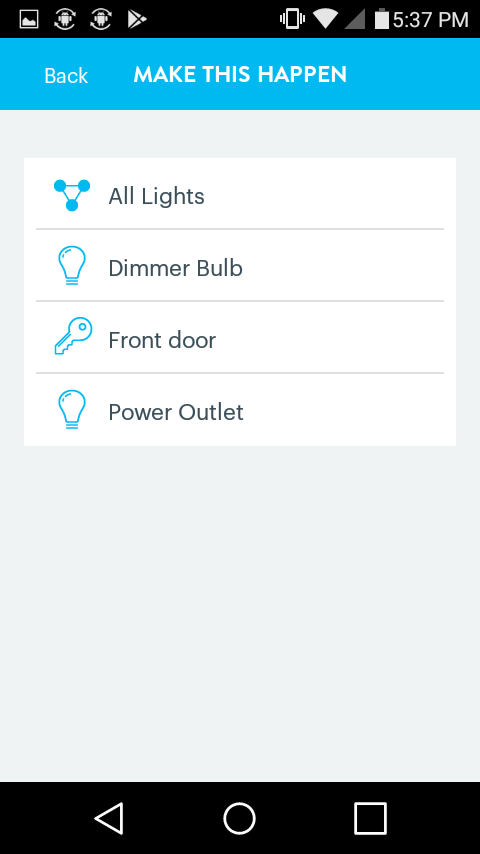
Select the device to control, in this case Front door.
Select action and save
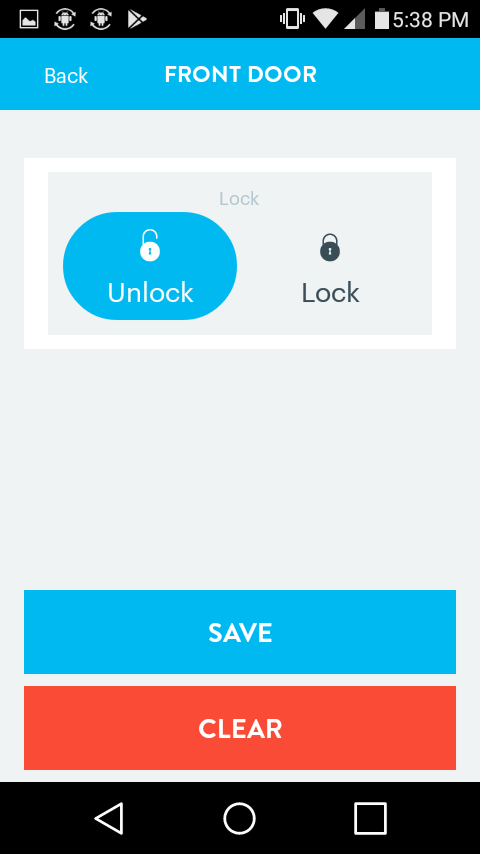
Select the state of the device, in this case unlock, and save.
Add a second action
Back on the create shortcut screen select "Make something else happen" to add a second action
Select a light
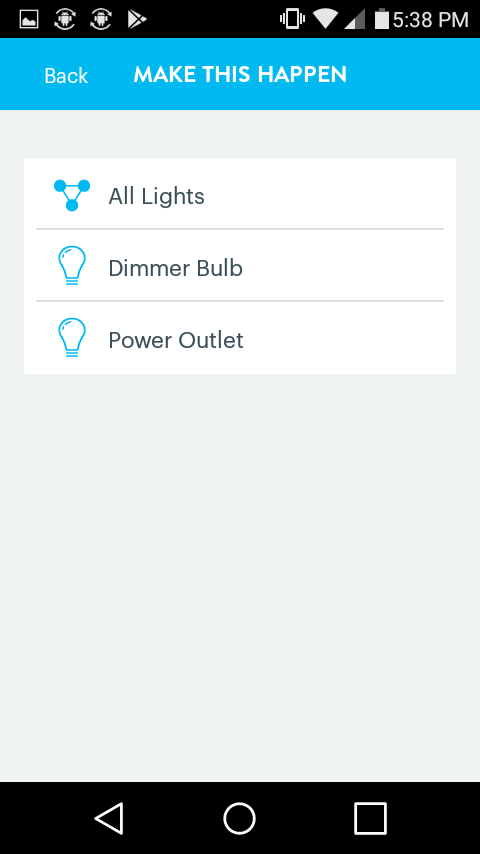
Select the next device to control, in this case the dimmer bulb.
Select the state you want
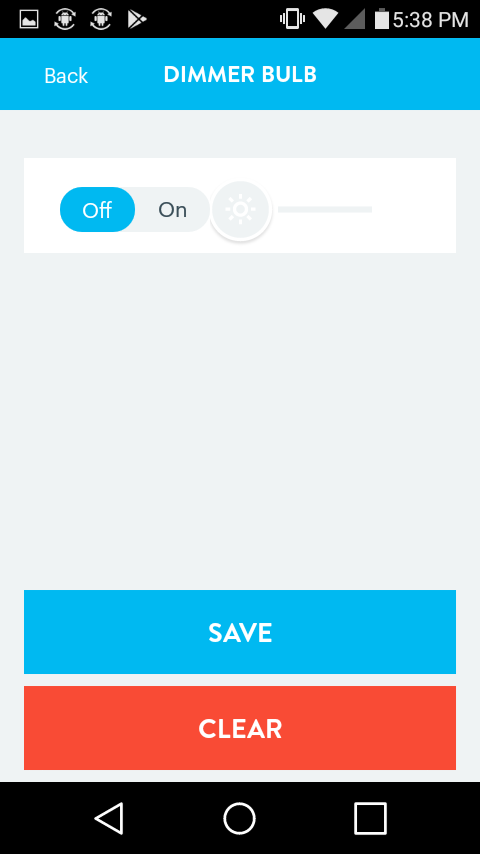
The light defaults to off when first opened. Select the state you want, in this case on.
Save
The screen updates to on. Select save.
Select done
Select done to complete the shortcut.
Add another shortcut
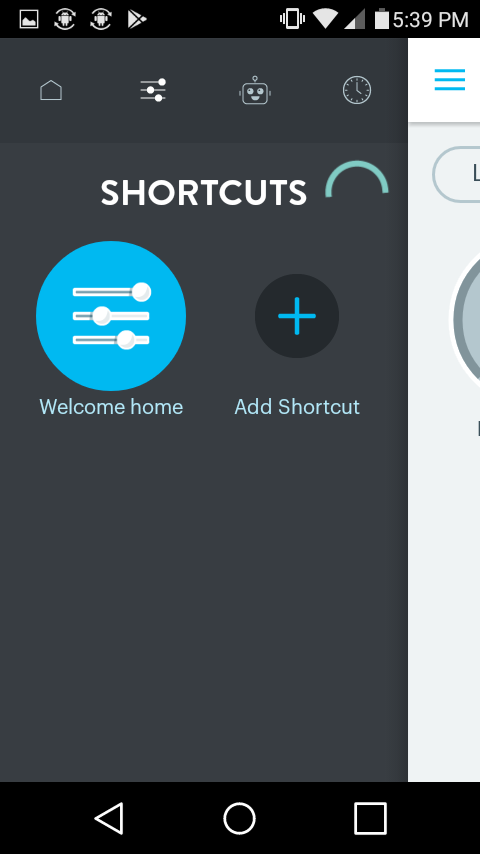
The shortcut screen now shows one shortcut. Let's create another. Select Add Shortcut.
Create the new shortcut options
Change the name and select two actions for the shortcut. In this example name the shortcut "Going out" and select the actions of locking the door and turning on the power outlet. We have a lamp plugged into the outlet.
Shortcut setup
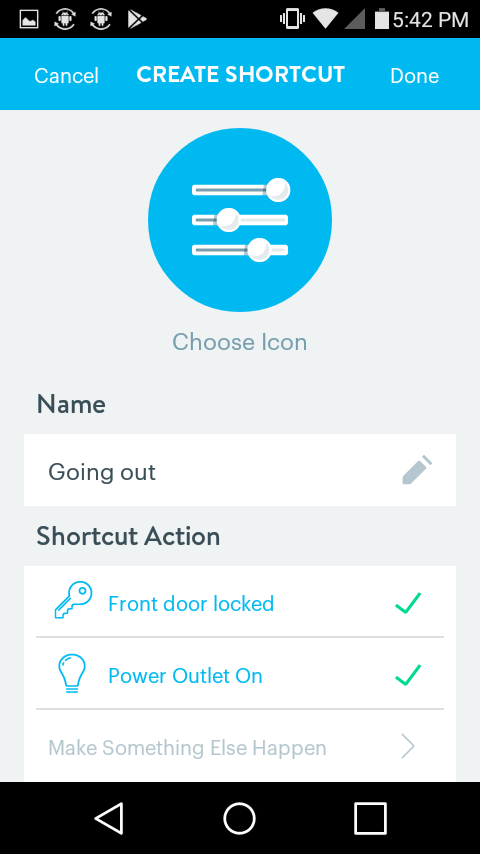
Here's what the create shortcut screen looks like after setting it up. Select done.
Two shortcuts
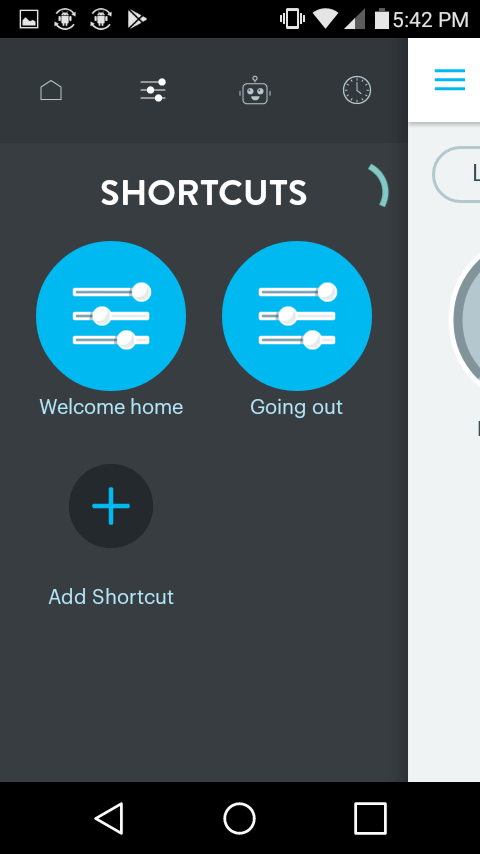
The shortcuts screen in the Wink app now has the two shortcuts. Let's look at them in the Pow!r Mount app.
Pow!r Mount app IoT Screen
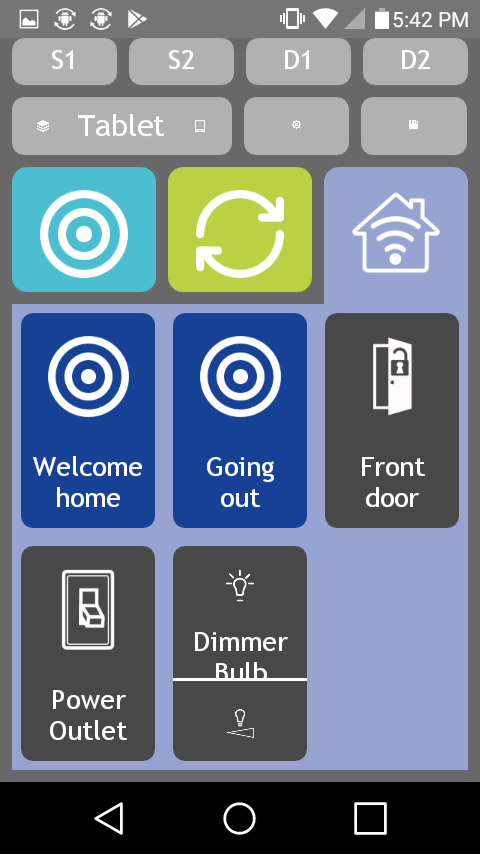
Open the Pow!r Mount app and go to the IoT Screen. The two shortcuts appear here ready to use.