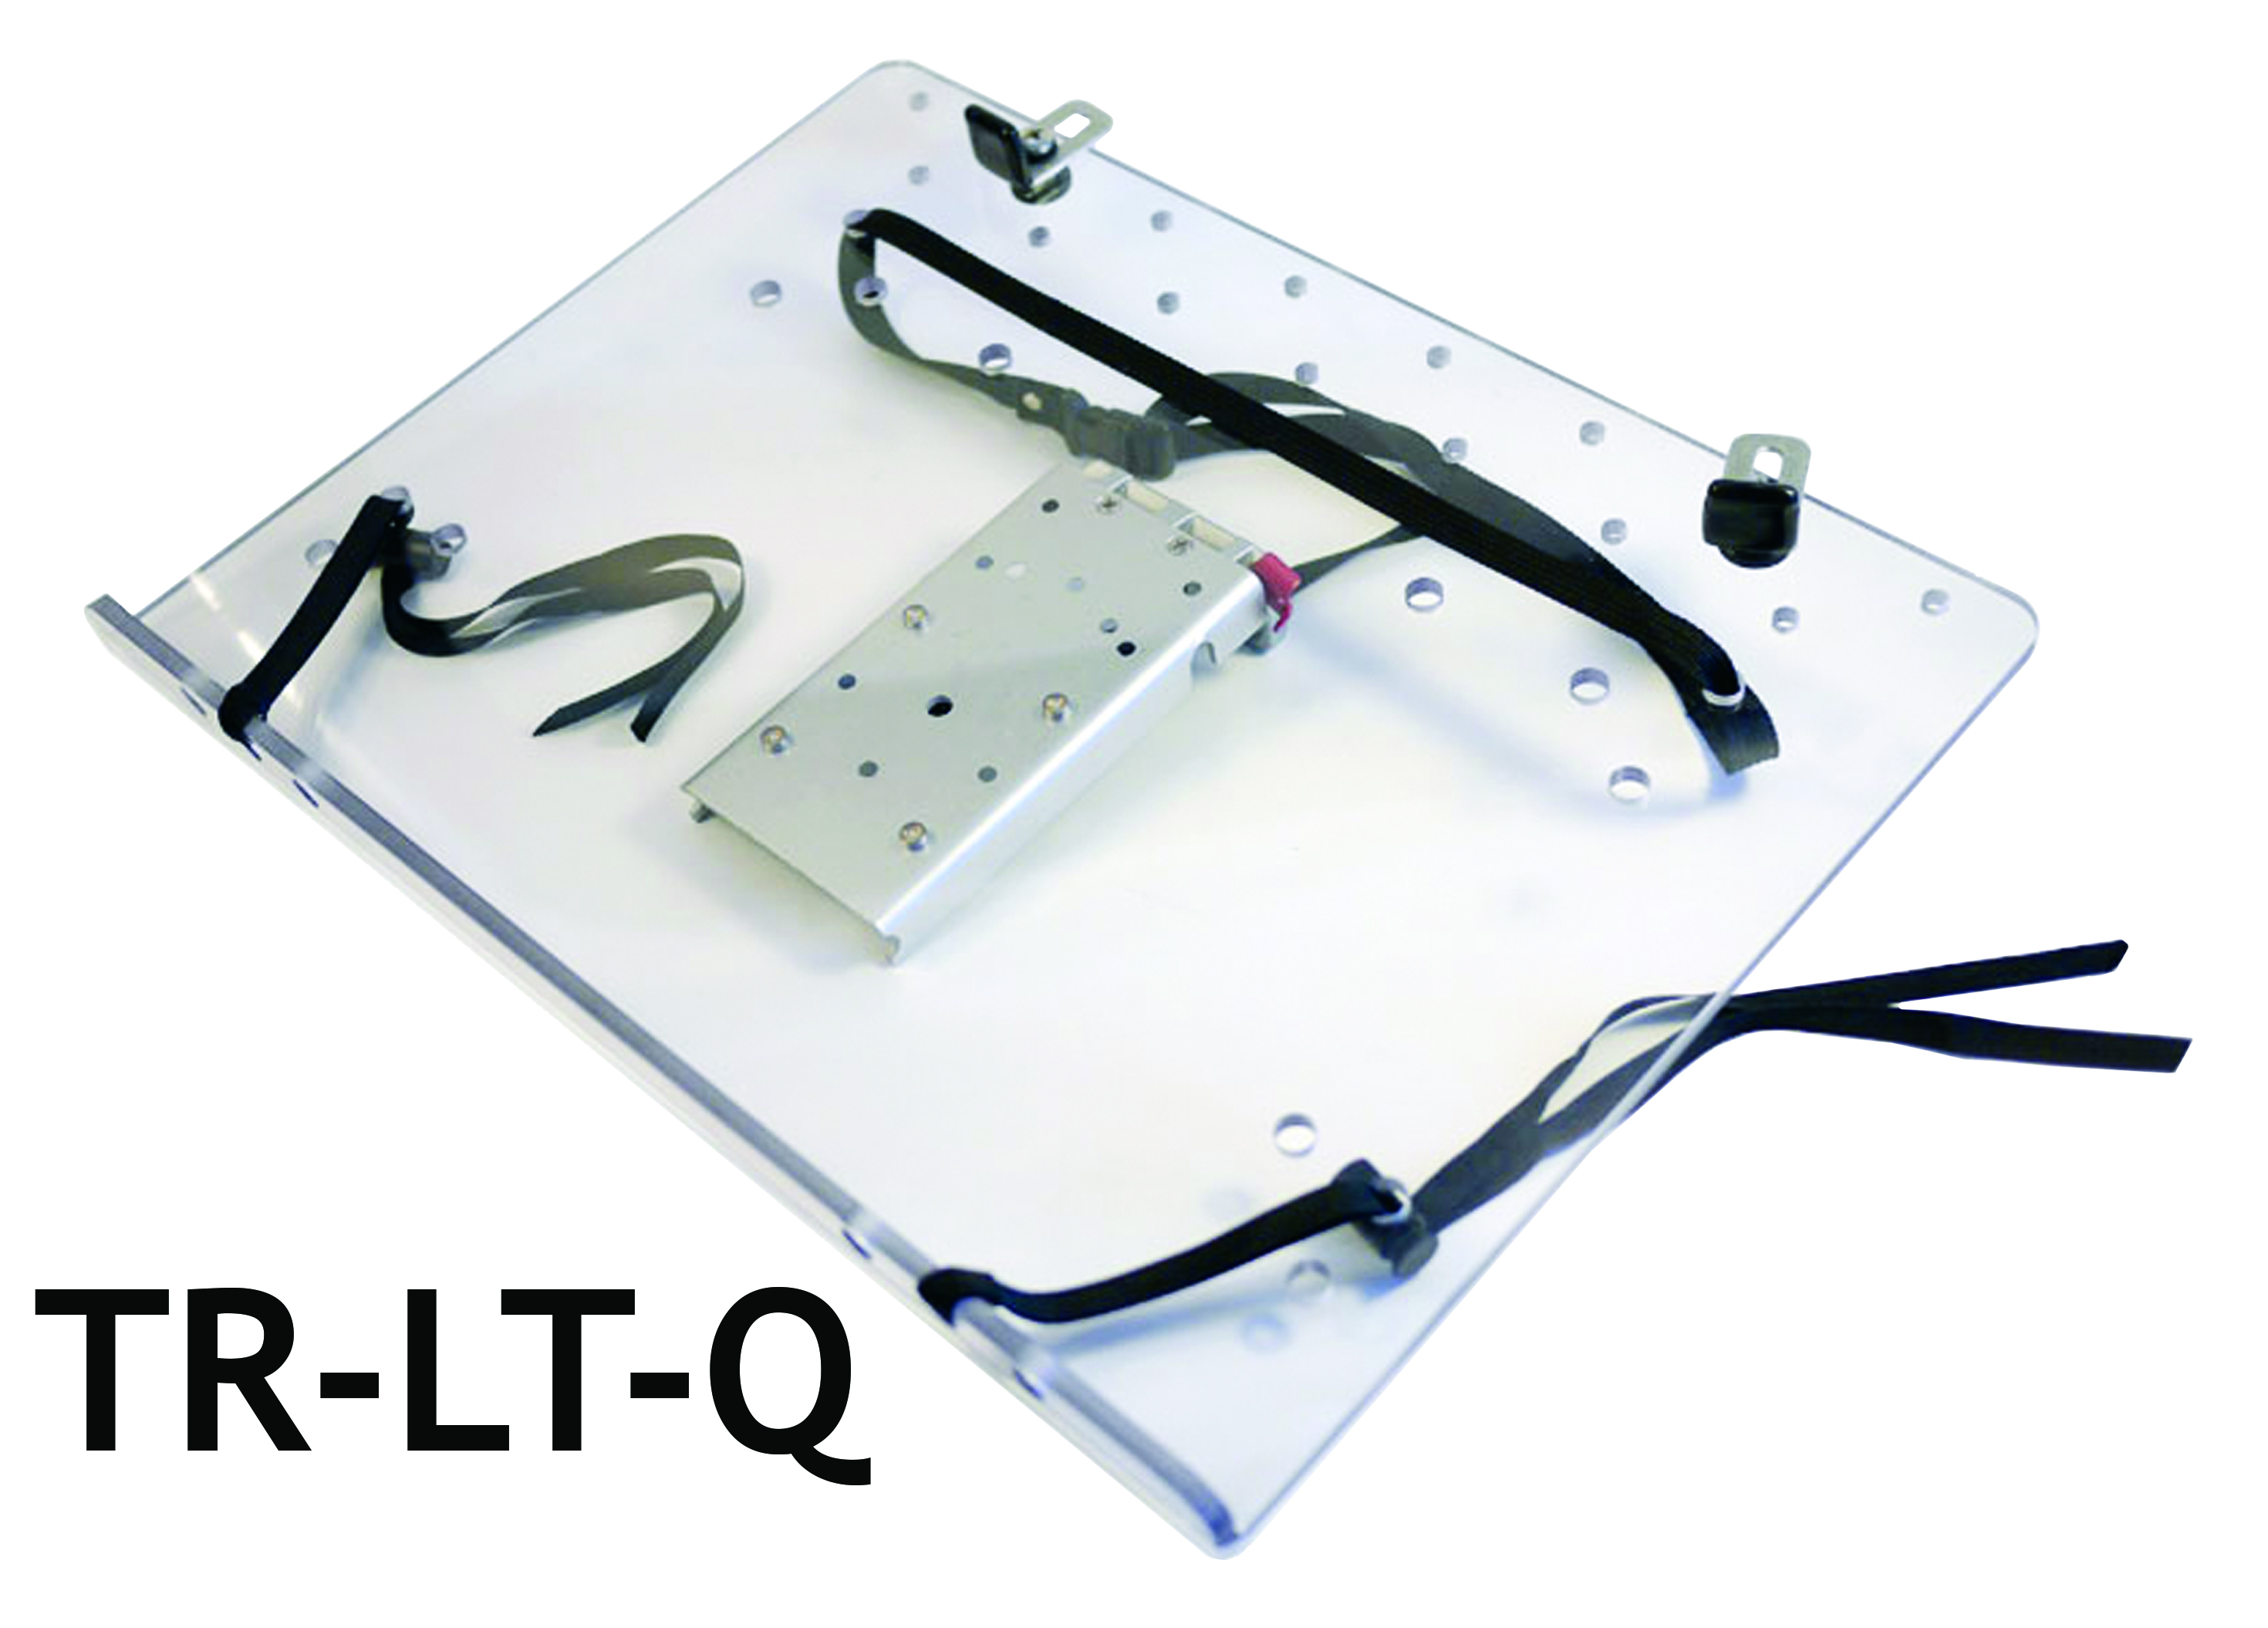
Laptop tray
The Laptop Tray is designed to accommodate a large variety of standard, full sized laptops.
Please contact us if you want to customize this for a netbook, tablet or similiar.
The straps can be repositioned to different hole locations to better match the laptop.
Make sure to consider power, USB and CD/DVD-ROM drive ports when adjusting the strap positions.
For clarity of instructions, we have omitted the QRP attachment on this page.
This can be done before or after inserting and securing the laptop.
 (shown with Quick Release Plate)")
Attach the laptop tray
Loosen the straps
Loosen the corner straps and unbuckle the long strap to allow the laptop to be slipped in.
Insert the Laptop
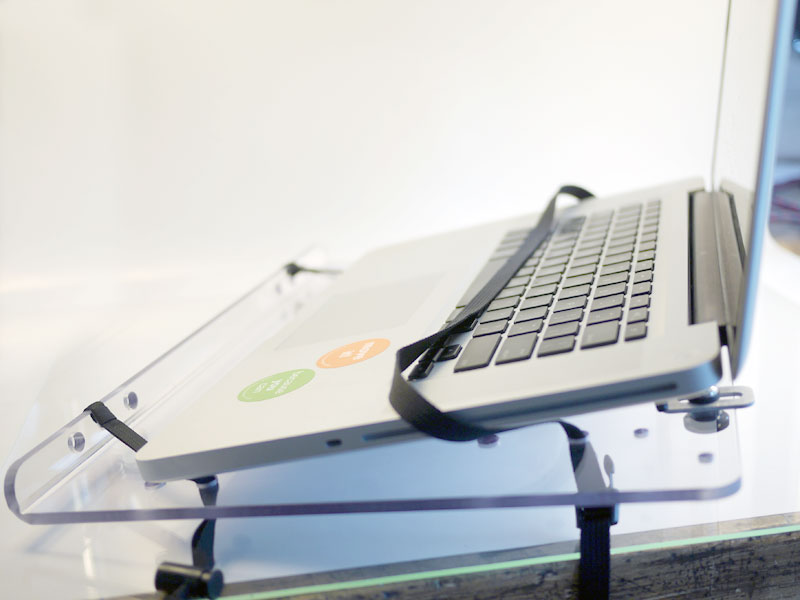
With the laptop open, slip it over the backstops and under the long strap.
Corner Straps
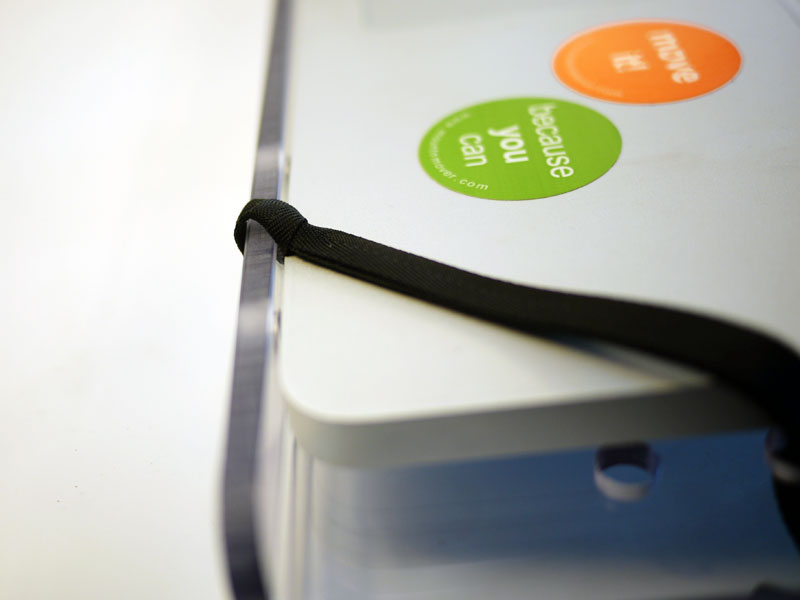
Make sure to tuck the corners of the laptop under the two straps in the tray corners.
Position the Laptop
Position the laptop so that it sits against the laptop tray lip, roughly centered on the tray.
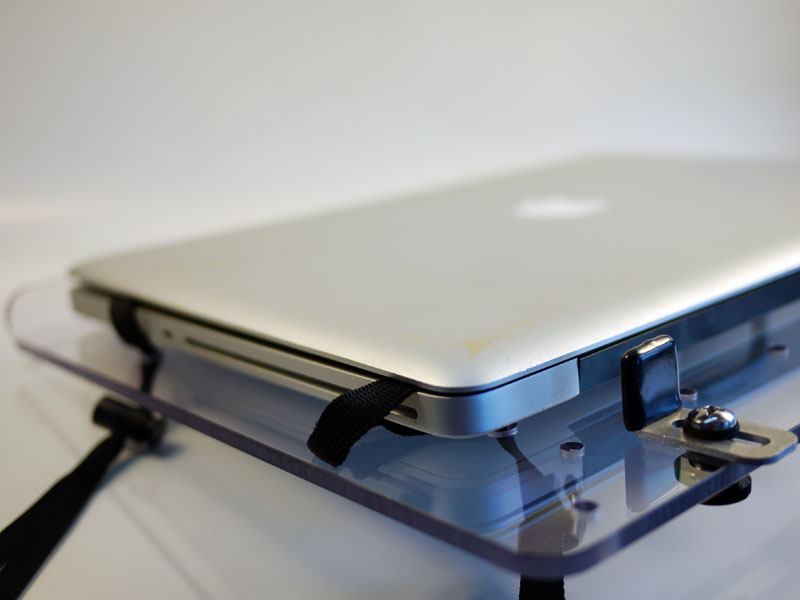
Cinching the corner-straps
Flip the laptop and tray over, so you can access the straps.
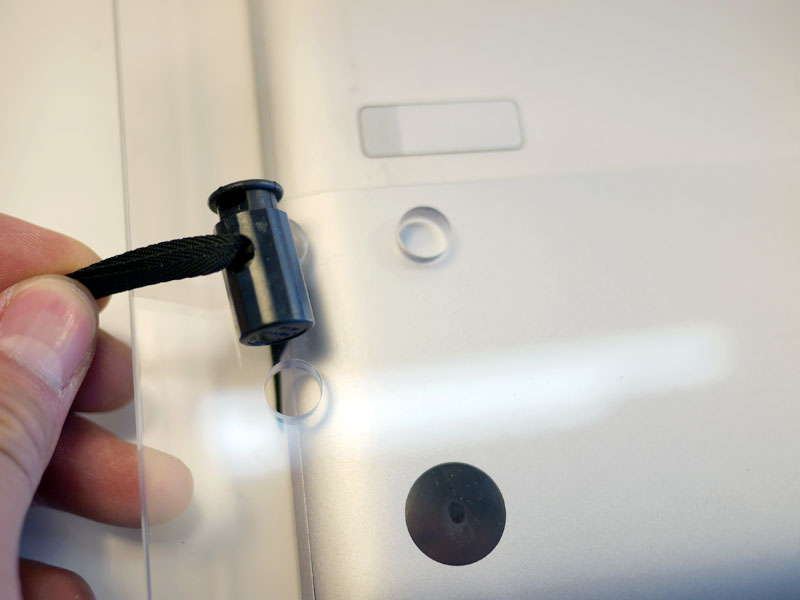
Tighten both corner straps using the barrel-loc fasteners.
To use the barrel-loc fasteners, depress the button (by pinching it) and then pull the straps to tighten.
Cinch the center-strap
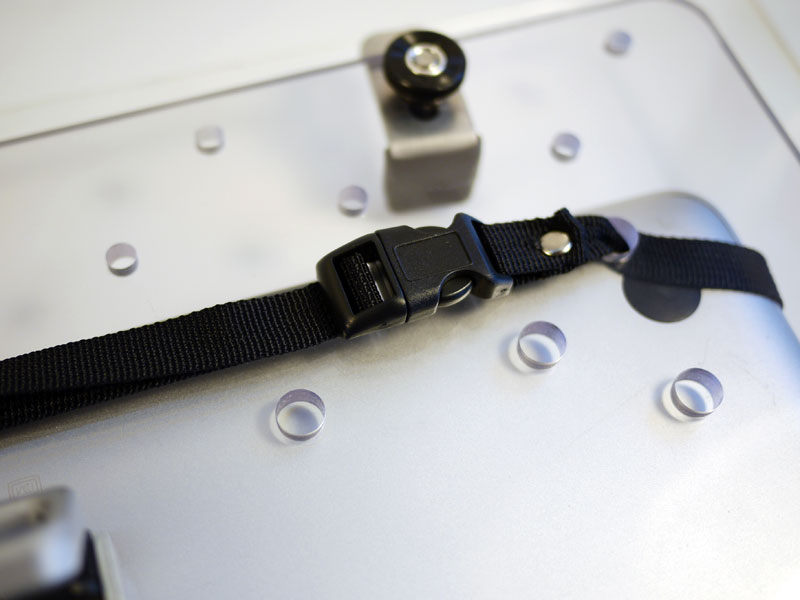
Clasp the center strap using the buckle, then tighten by pulling the open end against the buckle.
Optional: Backstops
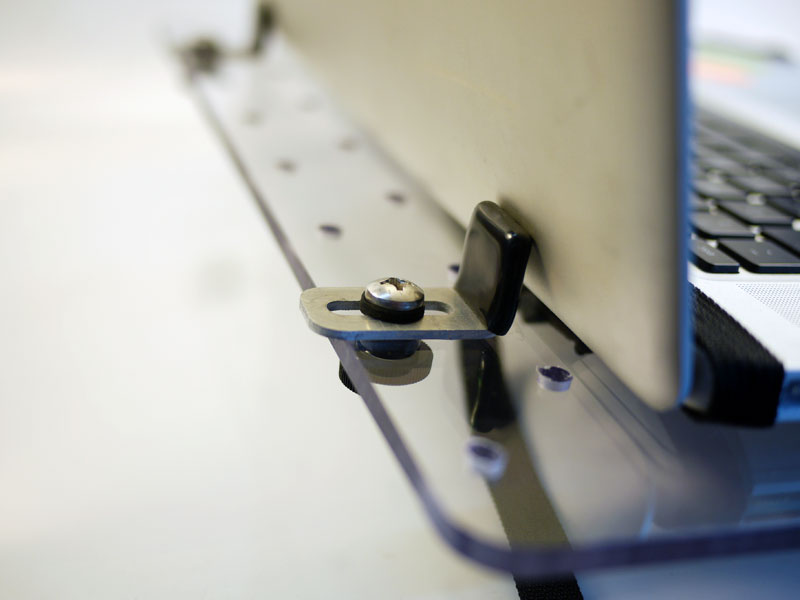
This may not be applicable to all laptops. Based off hinge configuration.
Adjust the back-stops to secure the laptop forward.
Done!
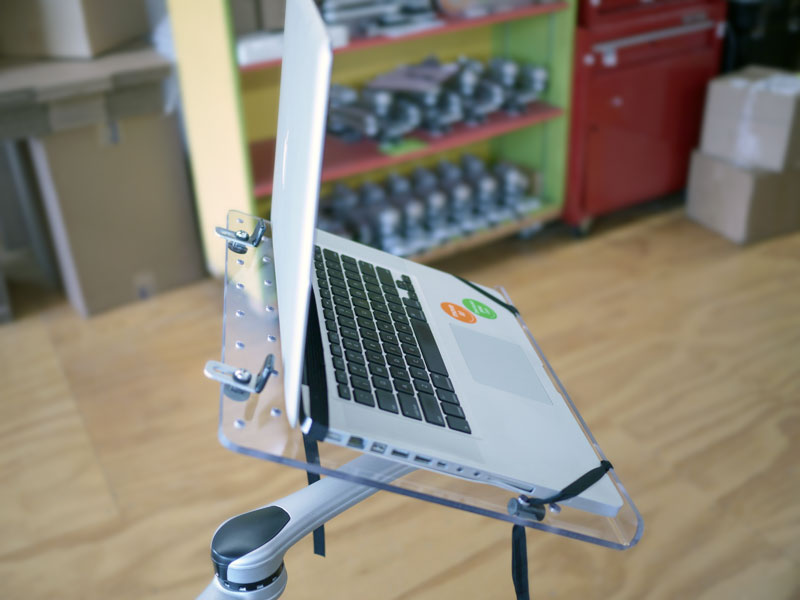
Your laptop is now securely attached to the tray!
Remember: The Quick Release Plate (QRP) can be attached at multiple levels to suit your needs.