Media library
Media library
Find images, documents and videos that appear elsewhere on this site. Use the filters below to search by name, type or tag.
Image

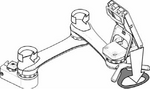
Hardware: Shoulder bolts, AP2 plate, AP4 plate, L-Angle plate, post clamp

Harley
HC-Exigo.JPG

HC-Exigo_6.4mmPlate.JPG

HC-Exigo_8.5mmSlot.JPG

HC-Ibis.JPG

HC-Ibis_track.JPG

HC-Puma-ArmTrack.JPG

HC-Puma-ArmTrack.JPG
HC-Puma20-31x16RectInsert.JPG
HC-Puma20-31x16RectInsert.JPG

HC-Puma20-ArmrestBracket.JPG

HC-Puma20-ArmrestBracket.JPG

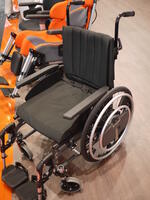
HC-Puma20.JPG

HC-Puma20.JPG

HC-Puma20_side.JPG

HC-Puma20_side.JPG

HC-Puma40Track.JPG

HC-Puma40Track.JPG

HC-Puma40Tray.JPG

HC-Puma40Tray.JPG

HC-SedeoArmBracket.JPG

HC-SedeoArmBracket.JPG

HC-SedeoTrack_attached.jpg

hinged tray closed.jpg

Hoggi Bingo

Hoggi Bingo close up of plates

Hoggi Bingo Evolution

Hoggi Bingo overhead view of parts

Hole-spacing.jpg

Holes drilled through frame

holstein harley.jpg
Homepage banner

HOOPPUSH.gif

Hover-AP2-WB2.JPG

Hover-AP2.JPG

Hover-FrameHoles.JPG

Hover-M2.JPG

Hoverround.JPG

How to adjust tilt diagram
How to move it

how to move it diagram.jpg

howto04.png

hs-0010.jpg

HS-NUT-H.jpg

Hybrid Shoulder.jpg

hybrid tilt.jpg

Ian with double decker
IanEvalSepiaW.jpg
IanMarineAc.jpg

IanMarineAcW.jpg

IC-Myon.jpg
. You will need an Angle Adjust Plate and possibly an L-Angle plate to position the Wheelchair Bracket to avoid the brake handle and footrest.")
IC-Myon_AP4_R1B.jpg
. You need a 1\" space for each clamp.")
IC-Myon_frame.jpg

IC-PowerTiger.jpg

IC-Pronto.jpg

IC-Pronto_Post holes.jpg

IC-Solara-frame.JPG

IC-Solara-SquareTubeOption.jpg

IC-Solara_1-AP2.JPG

IC-Solara_2-LAE.JPG

IC-Solara_3-LAE2.JPG
 and Solid Wheelchair Bracket to get the post vertical")
IC-Solara_4-WB.JPG

IC-SPECTRA-XTR,-a.jpg

IC-SPECTRA-XTR,-a.jpg

IC-SPECTRA-XTR,-b.jpg

IC-SPECTRA-XTR,-b.jpg

IC-Storm3GRanger.jpg

IC-Storm3GRanger.jpg

IC-Stream.jpg

IC-Stream.jpg

IC-T7a.jpg
IC-T7a.jpg

IC9000M2.JPG

IC9000_BridgeClamp.JPG

IC9000_LAE.JPG

IC9000_WCB_AP2.JPG
")
IC_Bora.jpg

IC_Bora.jpg
")
IC_Bora_bolt-heads.jpg

IC_Bora_bolt-heads.jpg

IC_Bora_bolt-heads.jpg

IC_Bora_mockup1a.jpg

IC_Bora_mockup1a.jpg

IC_Bora_mockup1a.jpg

IC_Bora_mockup1b.jpg

IC_Bora_mockup1b.jpg

IC_Bora_mockup1b.jpg

IC_Bora_sideview.jpg

IC_Bora_sideview.jpg

IC_Bora_sideview.jpg

IC_Bora_underside.jpg

IC_Bora_underside.jpg

IC_Rea-Dahlia30_closeupSide.jpg

IC_Rea-Dahlia30_closeupSide.jpg

IC_Rea-Dahlia30_front-underside.jpg

IC_Rea-Dahlia30_front-underside.jpg

IC_Rea-Dahlia30_side.jpg
Document
How does the Mount'n Mover differ from other mounts?