Media library
Media library
Find images, documents and videos that appear elsewhere on this site. Use the filters below to search by name, type or tag.
Image

IC_Rea-Dahlia30_side.jpg

IC_Spree-Footrest.jpeg

IC_Spree.jpg

IC_Spree.jpg

IC_Spree_holes.jpeg

IM-other.jpg

IM-SQtube_8mmThreadedPlate.jpg

IM-SQtube_8mmThreadedPlate.jpg

IM-SQTube_Plate.jpg

IM-SQTube_Plate.jpg

IM-SQTube_ThruBolts.jpg

IM-SQTube_ThruBolts.jpg

image.jpeg

image.jpg

image.jpg

image1.jpg

image1.jpg

image2.jpg

image2.JPG

image3.JPG

image4.jpg

image4.JPG

ImageGen.ashx_.jpg

ImageGen2.jpg

Img0726.JPG

IMG_0012.JPG

IMG_0013.JPG

IMG_0015.JPG

IMG_0022.JPG

IMG_0119.JPG

IMG_0264.JPG

IMG_0265.JPG

IMG_0280.JPG

IMG_0281.JPG

IMG_0283.JPG

IMG_0293.JPG

IMG_0294.JPG

IMG_0295.JPG

IMG_0390.JPG

IMG_0418.JPG

IMG_0754.JPG

IMG_1522.JPG

IMG_1831 (1).JPG

IMG_1836.JPG

IMG_1836.JPG

IMG_1836.JPG

IMG_1838.JPG

IMG_1838.JPG

IMG_1839.JPG

IMG_1839.JPG

IMG_20161025_211335004.jpg

IMG_2585.JPG

IMG_2586.JPG

IMG_2587.JPG

IMG_2588.JPG

IMG_2589.JPG

IMG_2689.JPG

IMG_2696 aya.JPG

IMG_3292.JPG

IMG_5624.jpg

IMG_5912.JPG

IMG_7737.JPG

IMG_9726.JPG.jpeg

IM_FrontierV6.jpg
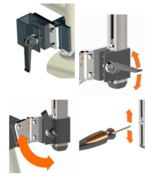
Insert post diagram

Installing the T-nut into the slide track on wheelchair

into tray 1-1.jpg

into tray 2.jpg

into tray 3.jpg

into tray 4.jpg

Introducing the next generation.jpg

Introducing the next generation.png

Introducing the next generation.png
Invacare Solara

Invacare Storm series torque 3

Invacare Storm series torque 3 T NUT_AP4_LAE_WB2

Invacare T7A

Invacare TDX SP2

Invacare TDX SP2 side view

invacare-quantum-track-wheelchair-mount.jpg

Invacare9000.JPG
Document
Improving Tent and Vestibule Accessibility through Universal Design and Consumer Input
Instructions for attaching the Tobii i13 and i16 to the Mount'n Mover with a tilt plate 12_06_19.pdf
Instructions for mounting to the Tobii EyeMobile.pdf
Instructions for Tobii EM 12 with Eye Mobile and Instructions for the Indi.pdf
Instructions to adjust fine tuner screw in tilt base (wrist joint)